Anyone who has ever been in my craft room knows that I am not what you would call a minimalist, or a “zen” crafter. Collector, hoarder or pack-rat are more appropriate. Maybe it’s just that my room is small, or lacks proper shelving, or maybe its because I hop from craft to craft like a cricket with A.D.D… either way, when I begin to amass new materials, I try to keep them organized. It doesn’t often work unless I dedicate ONE space to my materials.
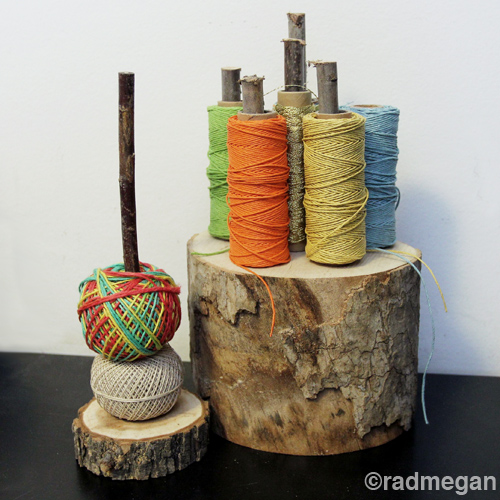
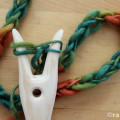
So when I began using hemp cord to make summer accessories with my radmegan knitting forks, I wanted to be able to access the pretty & lightweight materials quickly, and before the spools were absorbed into the piles of supplies.
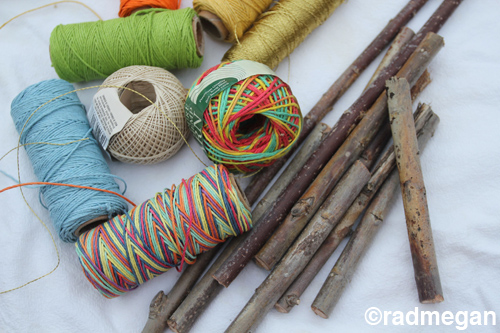
As you may know from the number of crafts I’ve posted that involve up-cycling sticks, I have a stock pile of branches and tree trimmings that I often turn to. I love using segments of branches in crafts. They give a great rustic look and are essentially free! So I turned to my pile o’ twigs, grabbed as many sticks as I had spools of twine and then found one of our larger stumps from a tree we’d cut down last fall.
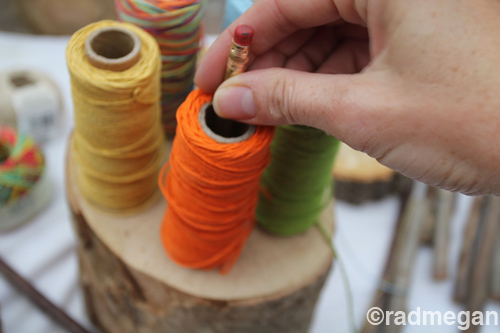
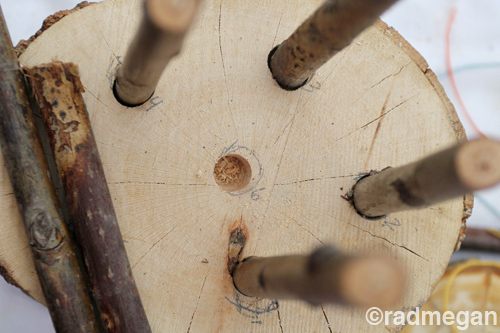
Using the large stump as the base, I arranged the spools so that they would all fit on the stump with the thinner sticks inside the spools. I then removed the inner twigs, and with a pencil, traced the area inside the spool directly onto the stump.

The pencil marks indicated where I would need to drill holes for the straight and slender sticks to go.

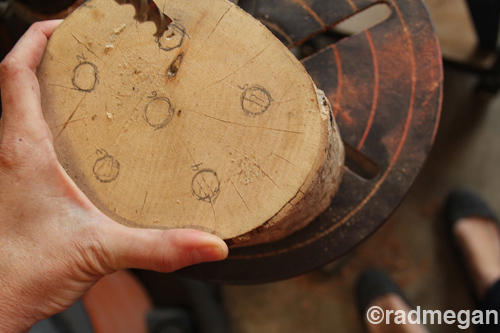
I selected a drill bit as large as the diameter of my stick, and using my drill press, began to carefully drill holes about 1/2 inch deep.
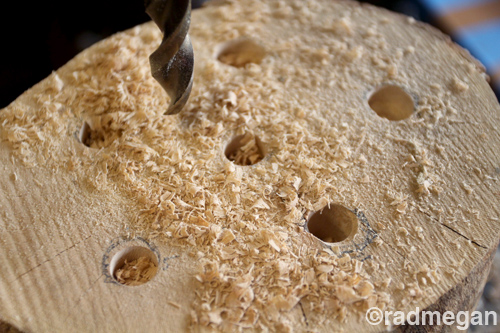
After drilling the holes, I checked to see if my twigs all fit. If they didn’t, I went back to the drill press, and made a second or third pass- until each twig had a perfect fit in each hole.
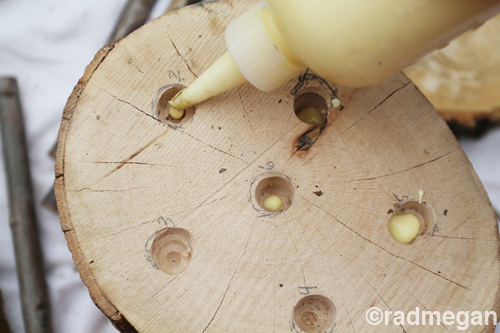
I used a dab of wood glue in each hole…
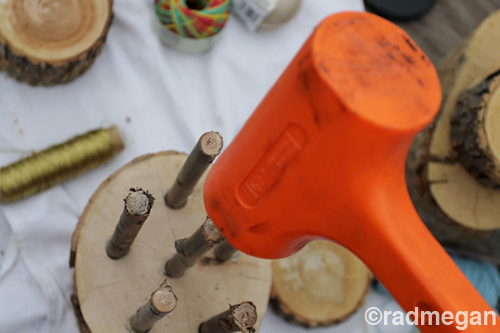
and our rubber mallet to whack the sticks into the stump!
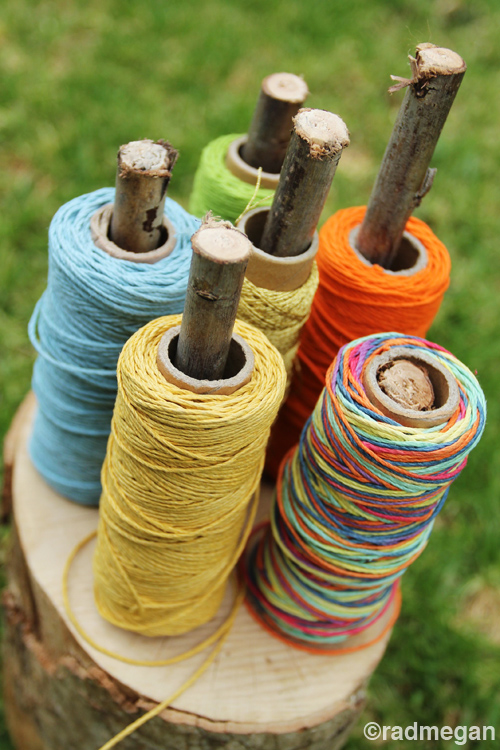
All of my spools fit perfectly! And for the smaller balls of twine I have, I repeated this process with a longer twig and smaller stump- so that I can stack more and more twine balls as I acquire them.
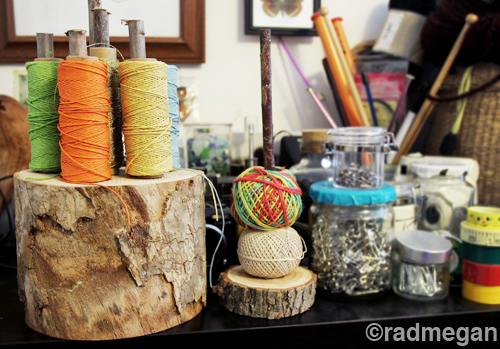
My craft room is still a bit cluttered, but I love that my hemp twine has it’s own special spot on my shelf. I’ll just need to keep an eye on the wood (for termites etc..) since it hasn’t been sealed. The last thing I need to introduce in my craft room is wildlife! These stumps have been drying out in our insanely hot garage… so I *think* I’m ok…


That turned out really nice! I love that you used wood 😀
Thank you Kenzie! I can’t seem to get enough of the natural wood look
xo
radmegan
that is really neat, what a great idea! thanks for sharing.
Que buena idea¡¡¡
felicidades
Cool crafts! Resourceful, very cool for little kids.
-Carlos Hernandez
Tree Service Brooklyn