It was last week, (or wait, was it two weeks ago, now?) when I got back from a long road trip through the western US states. I promised you (and myself) that I’d upload photos, share tales, recipes and travel-friendly crafts. Since I sort of buckled under the task of processing allll those photos, I wanted to at least start getting some of the crafts and other tid bits up on the blog. I know a lot of you still have summer travels ahead, I wanted to share my favorite craft for small spaces and long, long journeys: DIY Paper Beads.
What I love about these paper beads, is that they are a great craft after you’ve visited a few campsites or hotels, and have begun to amass a large quantity of paper. It’s amazing how many travel brochures, campsite maps, and flyers for local attractions you can collect during a vacation. I usually end up stuffing them into the glove box of our Vanagon until I can no longer open it….but from now on, I will be using the paper to make jewelry.
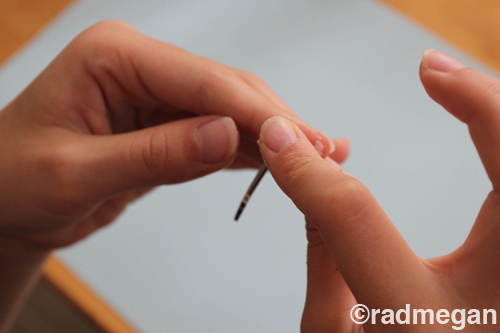
To begin, I made a crease in the longest side of my paper flyer. I tapered the fold so that one end was wide, (any width is fine. Mine was about 1/2-inch wide.) and the other side should come to a narrow point.
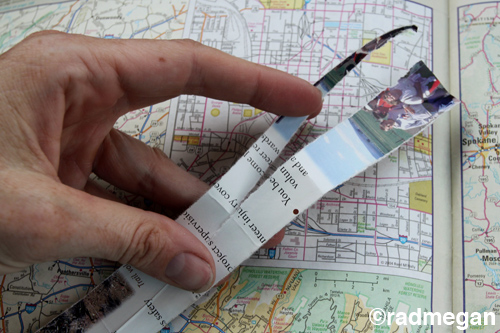
Fold this paper repeatedly and crease it with your fingernail, so that it tears easily, or if you are traveling with a pair of scissors, cut along the fold so that you end up with a very long, triangular piece of paper.

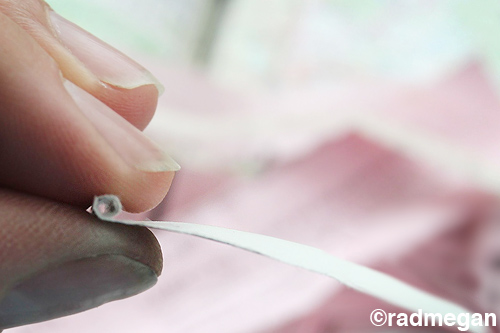
I started at the 1/2-inch end of my paper triangle, and rolled the paper in my fingers toward the narrow, tapered end.

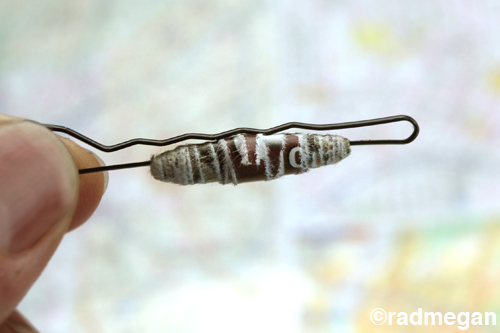
Once I rolled up the entire length of paper, I strung my new “bead” onto a Bobby Pin (I had several handy, and found that they held the paper in place very well.)
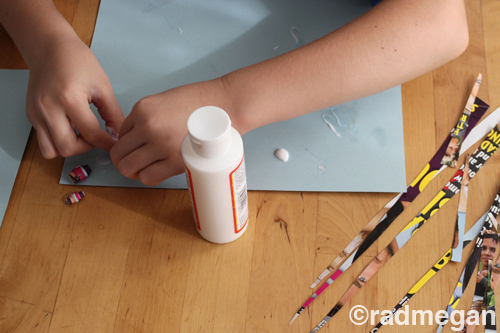
Since we were doing a LOT of driving on our trip, I thought it would be more efficient to make a little batch of paper beads (seen here on our dashboard) slip them onto Bobby Pins (2 or 3 per pin depending on size), and then glue all of them at the same time.
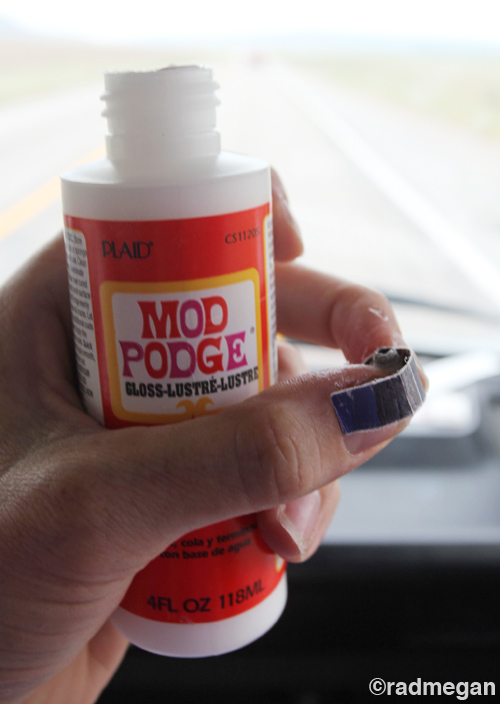
I had forgotten my bottle of Mod Podge on this trip, but lucky for me, the True Value Hardware shop in Thane, Wyoming carried several kinds, so I picked up a bottle and continued crafting on the road.
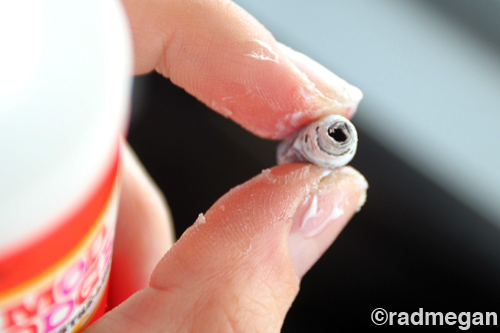
I removed the beads from their Bobby Pins, and added a dab of Mod Podge around the entire bead.
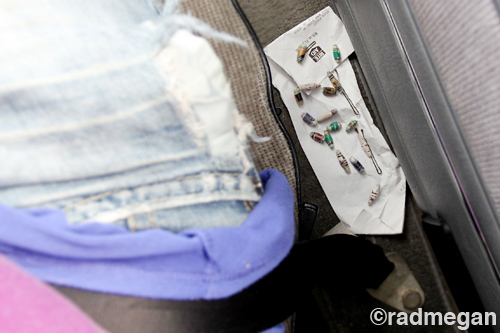
While normally, my husband would NOT be thrilled about me gluing in the car, Mod Podge is odorless so using it in a confined space was no big deal. Also, I used an old receipt to set my beads on while they dried. The photo above shows my collection of road trip beads drying in the car in the small space between my seat and the door. Don’t mind my super ripped jeans; I was on vacation and on my way to a campground somewhere in Montana.
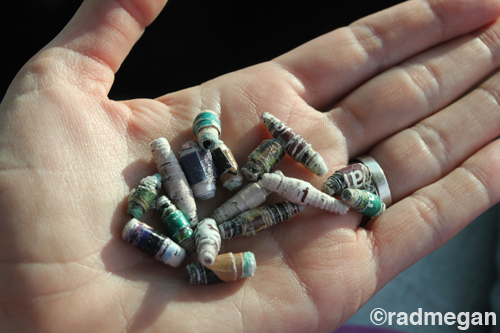
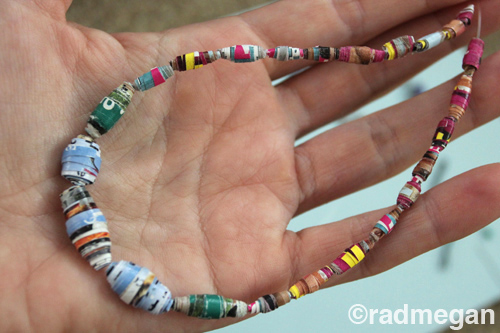
Once the beads were dry (only about an hour later) I had an awesome collection that I was ready to string up! The colors of the beads will vary depending on what kind of paper you use. I loved each one of my beads even though they were all different. Also, I used most of the paper we had in the car, so the overall length of my skinny triangles would range from about 8.5 inches to 3 inches. This resulted in larger and smaller beads.
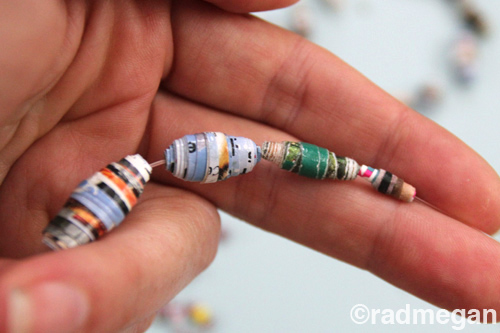
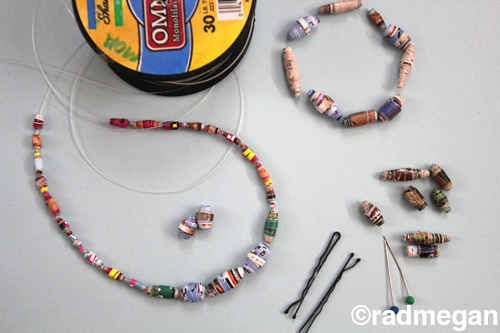
To create my paper bead necklace, I used fishing line which is available in most tackle boxes OR hardware/craft stores. Since I wasn’t planning on starting this craft when we headed out on our vacation, I didn’t bring any clasps to finish my necklace with, but I did have scotch tape to hold my beads on the fishing line until I made it long enough to slip over my head. Once the length was there, I could tie the two ends into a square knot.
I had so much fun making these beads that the HOURS of driving seemed to zoom by. And what I loved about this craft, was that since I made one bead at a time, I was still able to look out the window and enjoy the scenery, help my husband navigate unfamiliar towns, and essentially stop and start as often as I needed to.

And in case you are wondering how this project would work with children, the answer is: they think it’s RAD! I made paper beads with my 7 and 9 year old nieces when we arrived home, and they had a ball!
These beads are great for boys and girls of all ages. They make fantastic green gifts when traveling to a loved one, or a wonderful surprise if you are camping for a lengthy period of time and want to befriend your Camp Host.

Or just keep the necklace for yourself. After a few days of sleeping in the great outdoors, you might be feeling a bit grungy and greasy and need a little something extra to make yourself feel pretty. You can also sleep well at night knowing that instead of junking all that paper you gathered at various state parks, you made a piece of jewelry that gives the paper a new life, and will also remind you of that particular journey.


Awesome!!! Definitely going to have to get this to the Pinterest board!!
Thank you so much! I appreciate it!
xoxo
radmegan
so, so cool! ditto pinterest board and craft with my kids! thanks!
Thank you so much! You are so sweet!
xoxo
radmegan
I love these beads! When I was a teenager, my grandmother gave me this really long necklace made by my grandfather, that I loved. The beads were all greenish, so I could not tell they were paper until my grandmother told me. My sister and I spent days and days making these paper beads and made some pretty cool necklaces with them, that we sold at our grandmother’s shop. They were a big hit (this was twenty something years ago!).
I love this idea for making beads the car! (I’ve often wondered about doing this outside of the house, but never attempted it.) The idea of holding them with the bobby pins is clever. I really like how you used the paper you collected during the trip for your beads. This reminds me of an project I did with using a glue stick and paper clips to make paper beads directly on the chain – it might make a good traveling project, too — no odor & nothing to spill http://www.ilovepaperbeads.com/blog/make-a-bracelet-from-a-paper-clip-chain/
Trying this now, but while watching tv