Over the weekend, I decided I needed to make candles from scratch.
Was my house not messy enough? Didn’t my pile of homemade gifts already look like the Island of Misfit Toys? I really should limit my internet surfing to six or seven hours daily, because I see these incredible hand-made gifts for sale, (and mind you- I get that a lot of the things I see at Terrain and Anthropologie etc., are NOT in fact homemade, but machine-made, OR produced by crazy-talented professional crafters and artists who are robotic in their precision, patience, and skill) but I seeee these things, and that little voice inside my head starts whispering, “If they can do it, so can you… my preeecious”
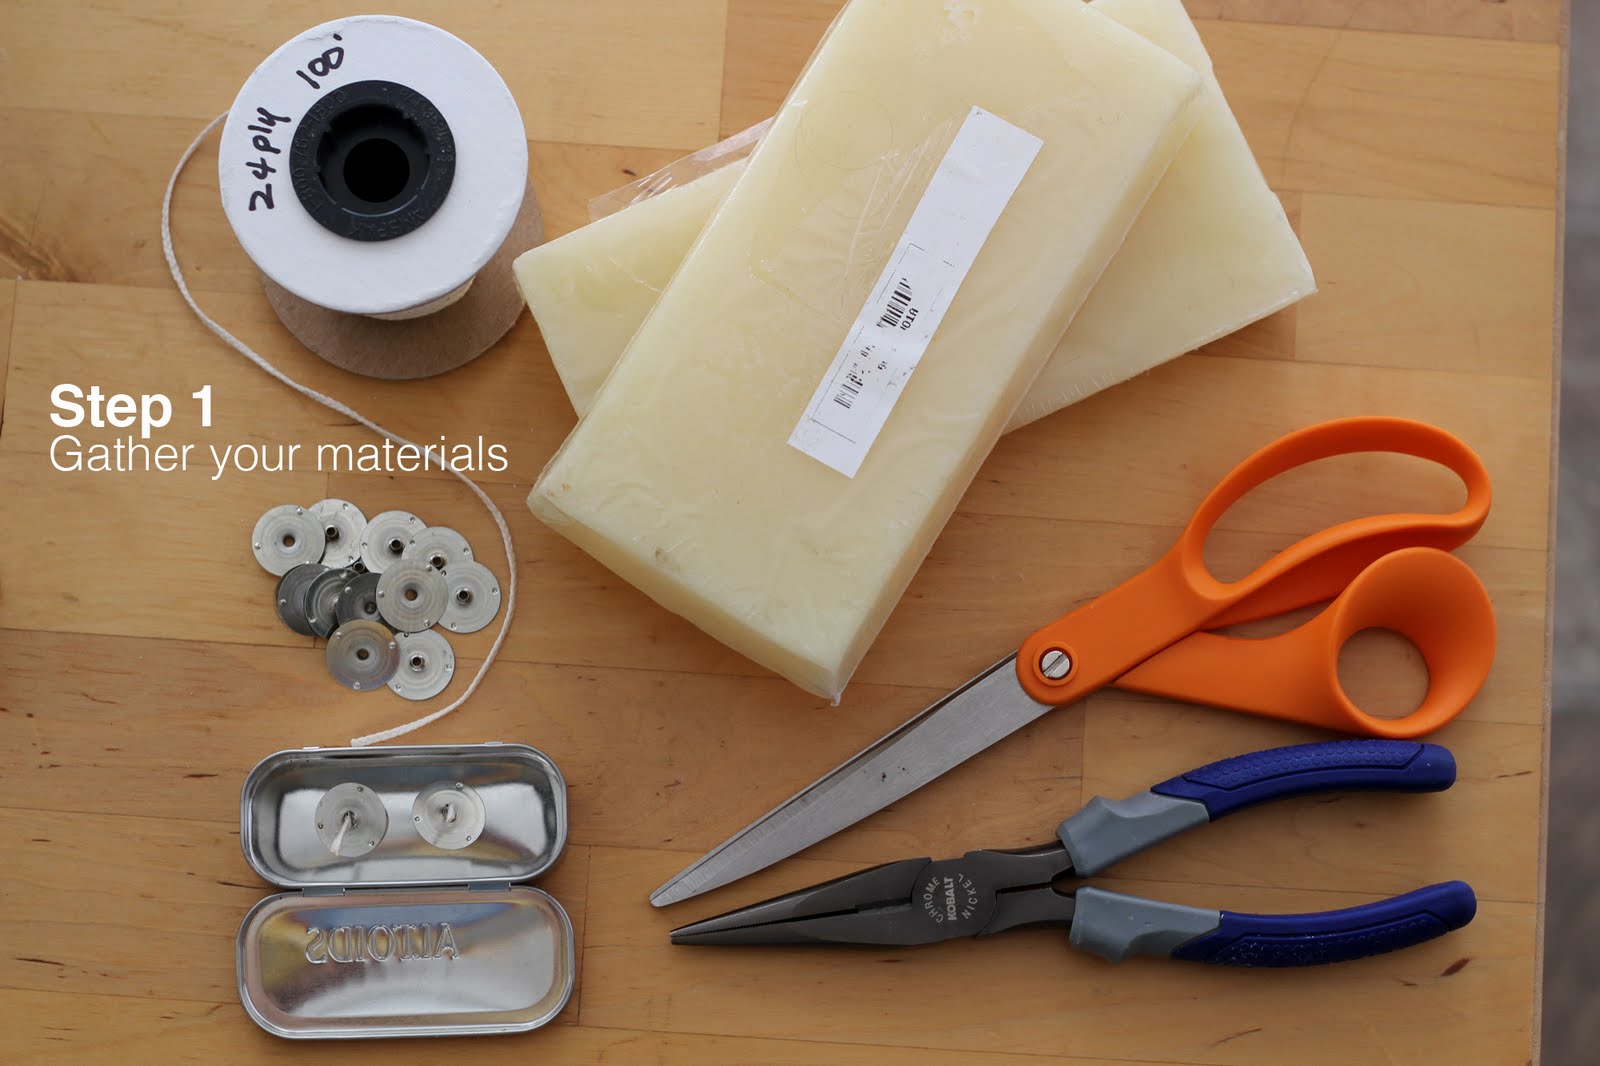
So! Where to being? For at-home candle making, you will need:
Metal tins (new, or recycled (tea tins, Altoid gum tins etc…)
etc…)
Pliers
Hot glue gun and glue
Rubber bands
Funnel
Double boiler
Loose-leaf tea
Wax paper
Optional:
Band-Aids, Ice Cubes, Aloe Vera, the patience of a Saint
Start out by snipping the candlewicks about two and a half inches longer than the height of your tallest tins. For shallow tins cut the wicks about an inch higher than the tin.
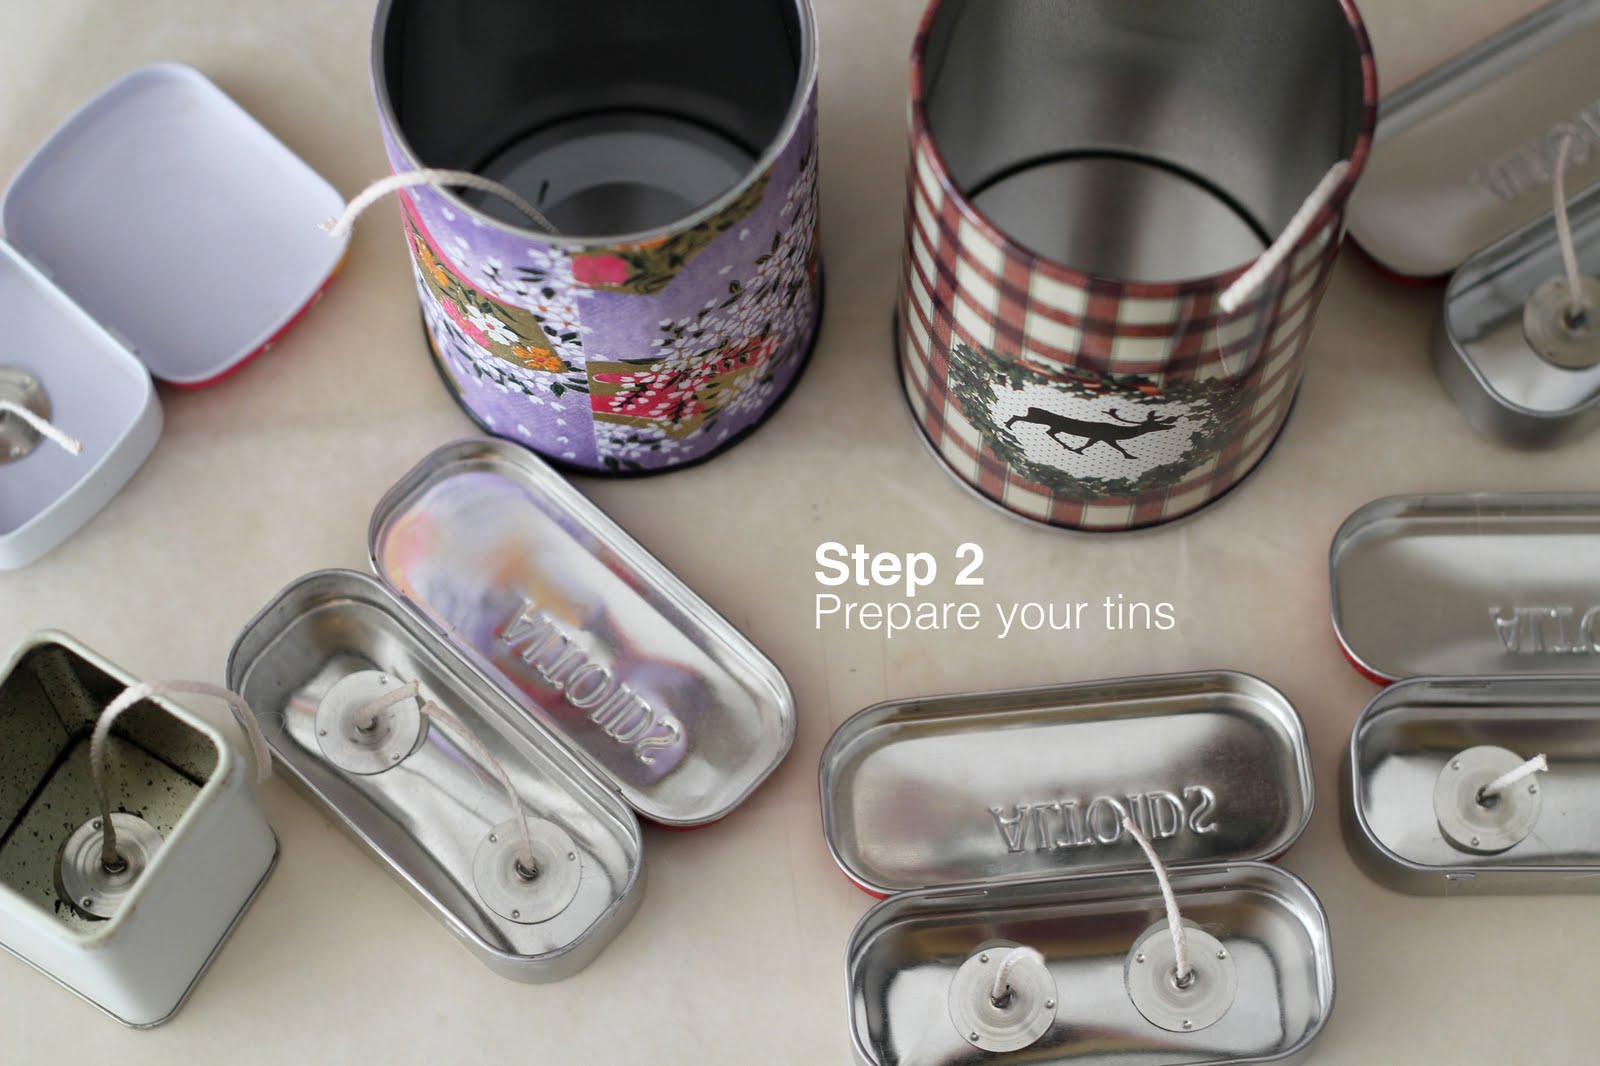
Thread the wicks through the metal wick bases, and pinch the top of the base closed with pliers. Repeat, repeat and repeat. Next, hot glue a wick base in the center of each metal tin. Once all of the tins have their wicks glued in, wrap rubber bands and around the lip of the tin, and tuck the wick thread into the rubber band to secure it.
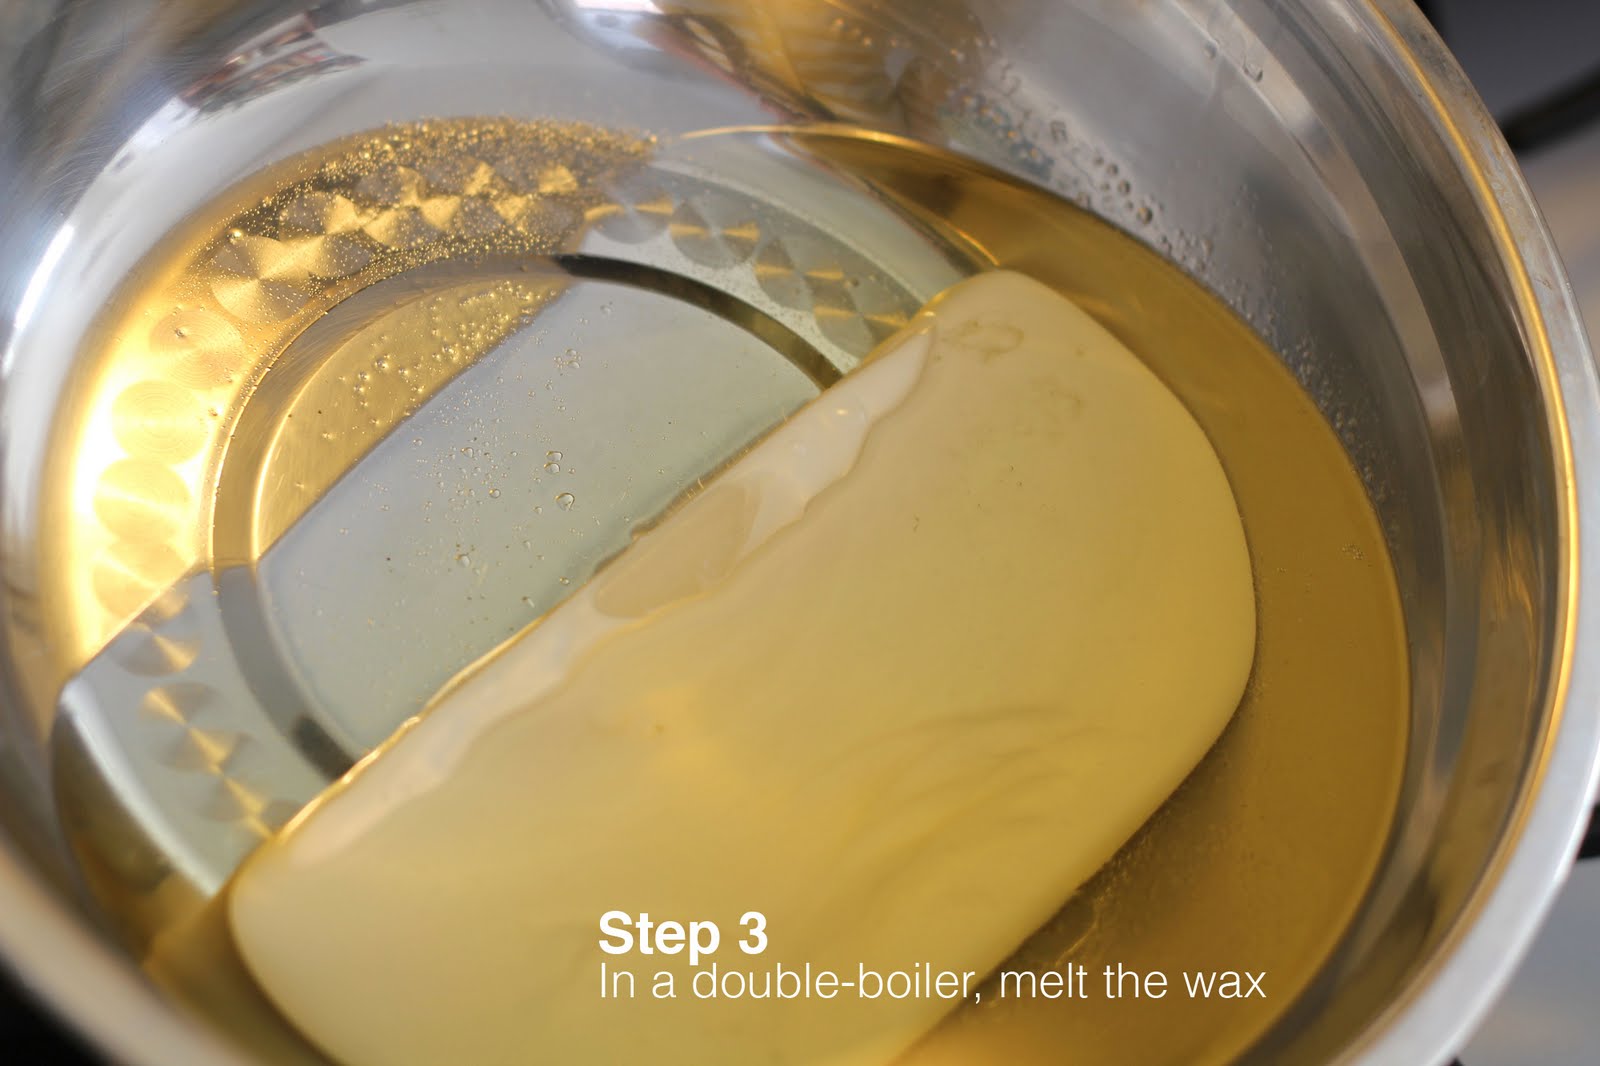
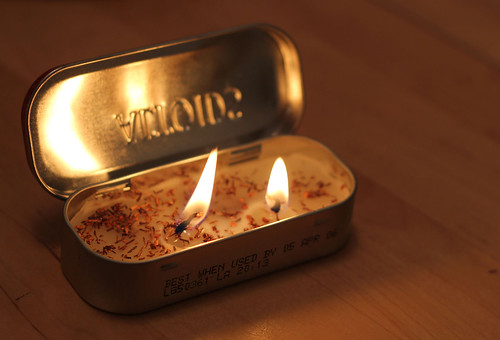
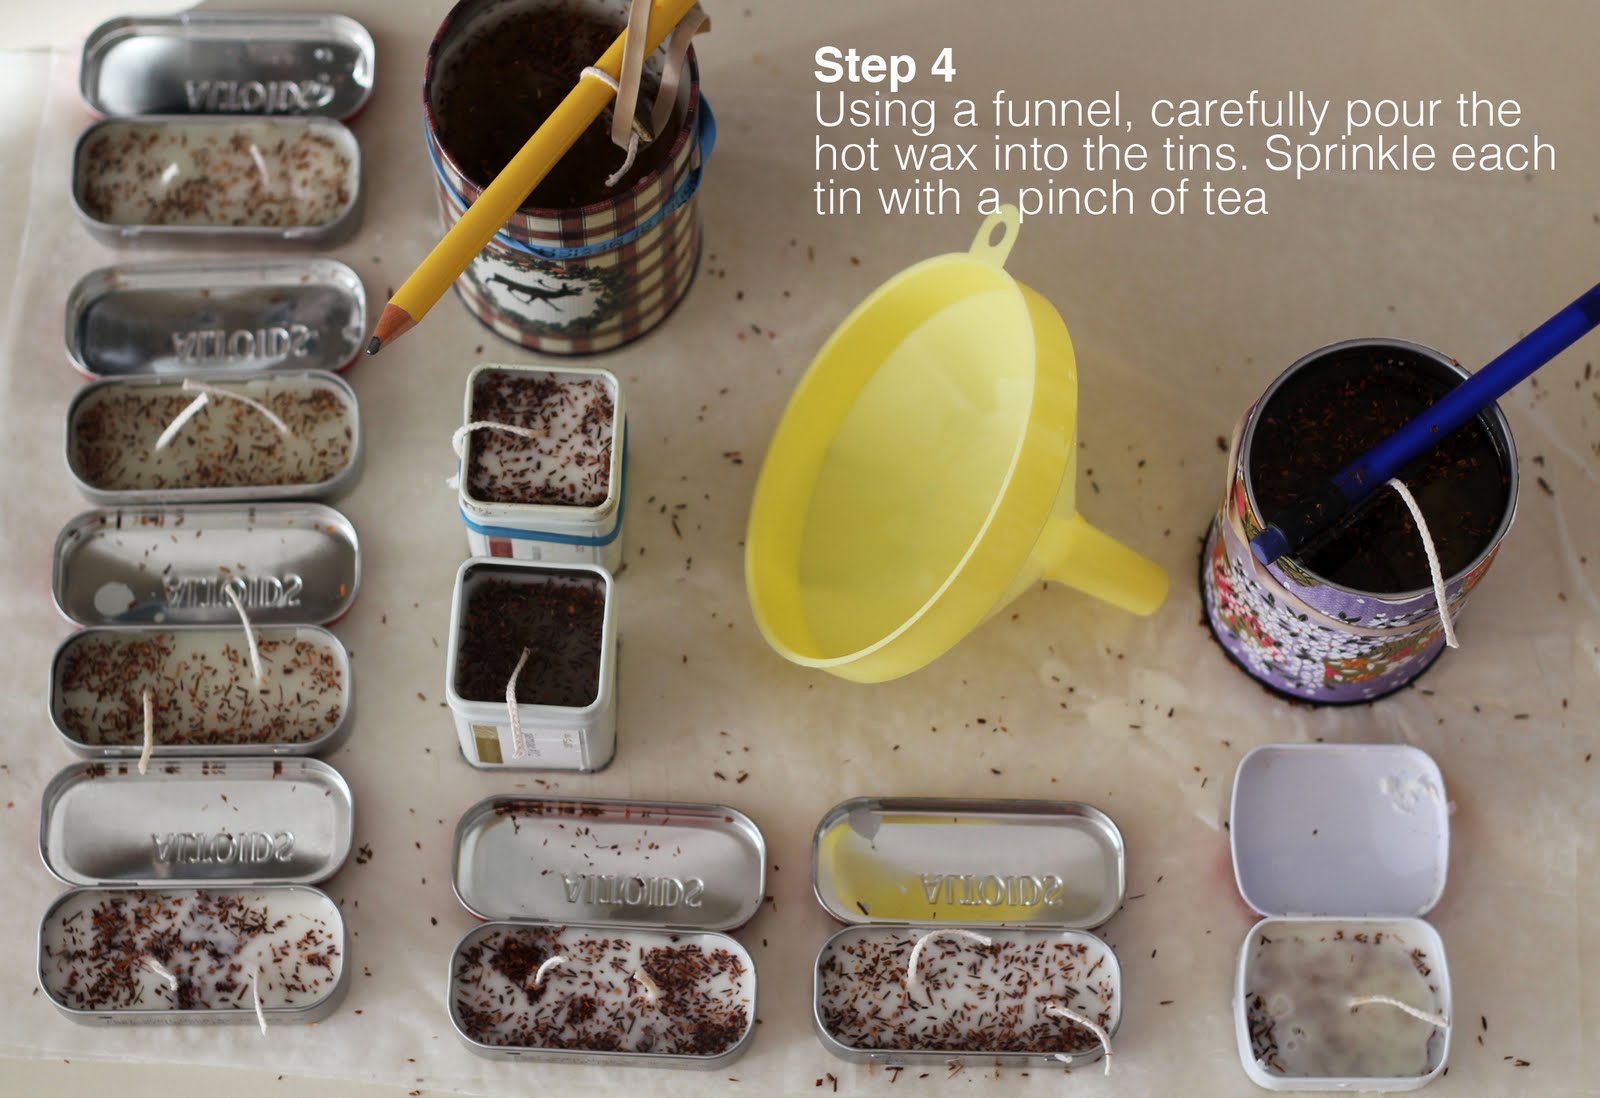
Put the blocks of wax in a double boiler on the stove, and using a silicone spatula, stir gently until the wax has melted. Place all of the tins on a piece of wax paper, and using a funnel, pour the hot wax into each tin. Sprinkle the loose-leaf tea into the wax, and take care to make sure all of the wicks are centered, and that none of them have sunk down into the hot wax before it sets.
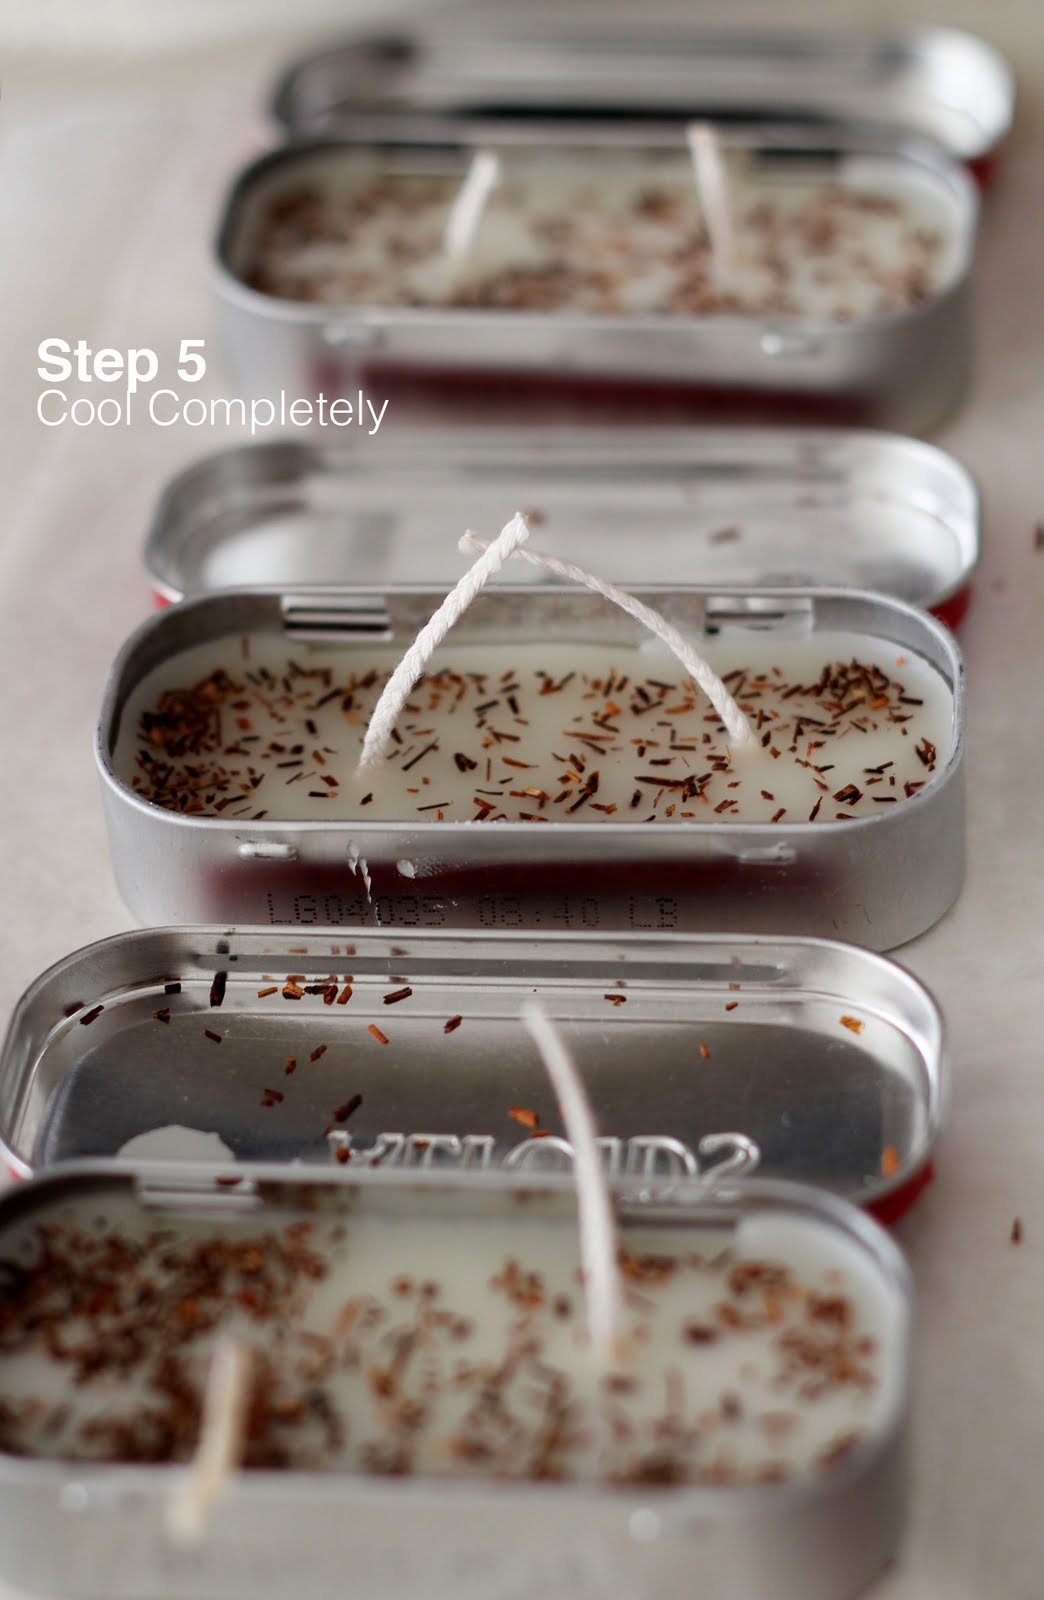
Leave candles alone until the wax has dried completely (I left mine for a few hours.) Use the drying time to tend to any spilled wax, burns, or scattered tea. I made a crazy mess of the kitchen while making these candles, so there was plenty of clean-up.
At first, my candles looked awesome. Over time, a few of the taller candles developed cracks in the wax. Also, I still have wax all over the inside of my funnel and double boiler. The dried wax chipped off of my silicone spatula with no problem, but I’m still trying to figure out the best way to clean up (or ignore forever) my waxy metal bowl and plastic cooking funnel.
I’m going to go ahead and file this craft alongside homemade marshmallow under, “Crafts to do if you love a mess, spending money, and risking injury.”
Was I happy with the final product? Sure! Did they look like the rustic, yet polished stuff I bookmark online? Mmm nope! Was this cheaper than buying my own candles? Not by a long shot. But what better way to say, ”happy holidays” than by coating your kitchen in wax and potentially incurring second degree burns for loved ones.
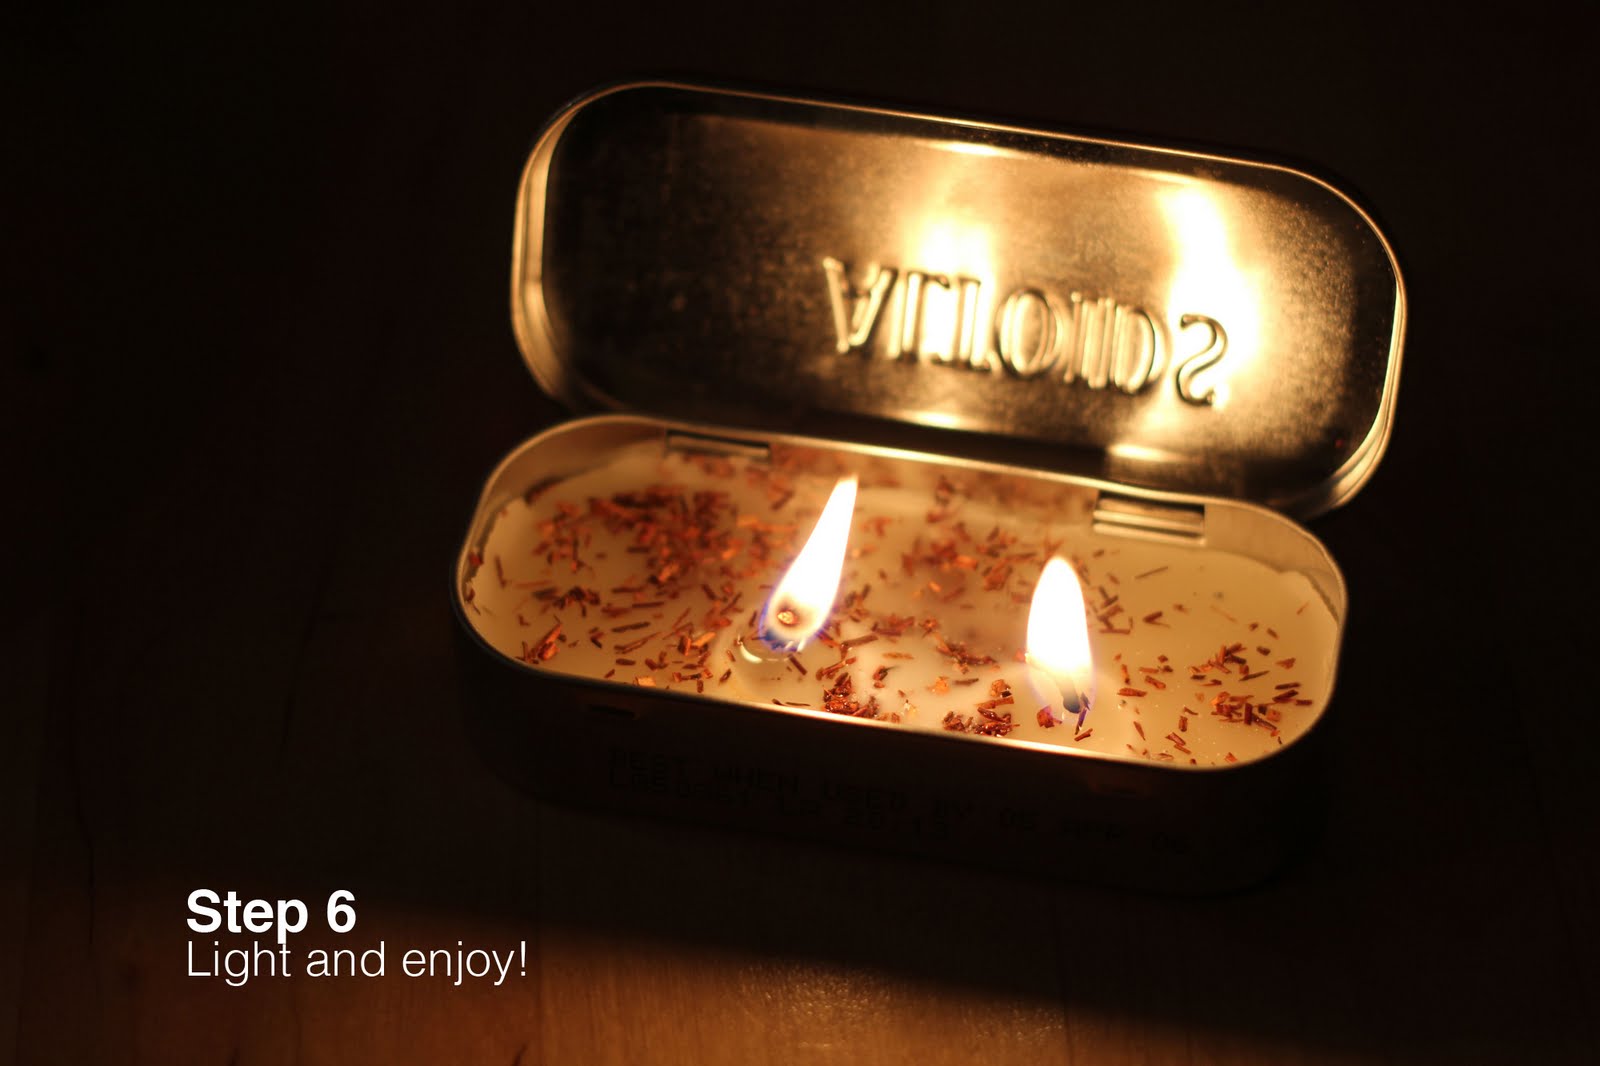
It’s the thought that counts, and I thought you wanted a cracked and faintly tea-scented candle I made from old gum tins… looooove you.


HAHAHAA.
I think I might have put this idea into your head. But there’s nothing more I’d like to offer you than the opportunity to incur permanent scarring.
Girl, you FOR SURE put this idea in my head! I bought the wax and wicks like seconds after you showed me that link. Took me thousands of internet pages to work up the courage to get the nerve up to actually try it! You are a total craft seed-planter and I love you for it! xoxo
Hahah, I love how honest you are about this little crafting disaster. It always seems like a brilliant idea till about half way through. Even though I know it’s a bad idea though…man I am still going to need to make candles at the start of the new year. I guess I like the mess.
I LOVE THIS!!! I am going to see if I can crank out a few of these for family gifts before Friday.
@ TheThingAboutDaisies Thanks- I’m glad you too see the allure in a craft that’s almost certainly a mess, yet still fun and rewarding. Good luck!
Thanks Matt! Hope they turn out well!
put the double boiler and funnel into the freezer, it makes the wax easier to remove. works great for candle holders too!
Thanks Mandy! Someone else told me about that freezer trick! Thanks for reminding me about my funnel! It’s been in there for a week now and I totally forgot about it!!
Another fun twist on candles is to put crushed ice into a clean yogurt container with the wick and pour the hot wax over the ice. It makes holes in the wax once the ice melts. Don’t ask me how the plastic yogurt container doesn’t melt (I did this project in 6th grade). Once the wax is dry you can pop the yogurt container off. Don’t use the skinny Yoplait containers or you’ll have to cut the container off.
Hahaha this was an awesome article!!
Another way to get the wax off of things, Line a cookie sheet with paper towels and set the double broiler and funnel upside down. Turn your oven on the lowest temperature possible. Put it in for maybe 10 minutes. Most of the wax just melts onto the paper towels. Just wipe the broiler and funnel down with a paper towel to get the residue off. Hope this works as well for you as it did for me!
If you do end up putting them in the oven with paper towels be sure to line your cookie sheet with foil for easy clean up of any wax that misses the paper towel. I fill my sink with very hot or boiling water if the wax is thick & soak them then just wipe the melted wax out with a viva paper towel. Just be sure you don’t fill the sink up too far as you don’t want water getting in to whatever container, jar, etc because it will clog your pipes (trust me on that). As for your funnel you can place it on a few paper towels & microwave it until the wax melts, then wipe clean with paper towels.
Soy wax melts at a relatively low temperature and cleans up with hot soapy water.
Awesome. I’ve got to try this.
Great idea
I used a cleaned-out tin can in which to melt the beeswax. You can also pinch one side of the can to create a spout. This eliminated the ruined cookware and minimized the mess. Store in a box for next time.
I used a cleaned-out tin can in which to melt the beeswax. Just place smaller chunks of wax in the tin and place the can in your pot of water. You can also pinch one side of the can to create a spout. This eliminated the ruined cookware and minimized the mess. Store in a box for next time. I also used layers of newspaper under the project to protect surfaces (also acts as insulation from the heat of the containers on your work surface), to absorb water from the outside of the tin, and for easy clean up (roll up the top layer and discard).
Mircowave plastic over paper towel to remove wax. Or freeze the plastic funnel.
Did the candles actually smell like the tea, or was it more decorative?
Karla recently posted…Breathing in the Apples