• Home
  • About Megan
    • Student Gallery
  • Writing
  • Video Training
  • Knitting Fork Projects
  • Categories
    • Baby Crafts
    • Baking
    • Book Review
    • Camping
    • Cooking
    • Crafts
    • Etsy
    • Gardening
    • Guest Blogger
    • Holiday
    • Kid Crafts
    • Knitting Fork
    • Needle Felting
    • News
    • Photography
    • Recipe
    • Sewing
    • Teaching
    • Travel
  • Sponsorship Info
  • Contact
  • May 13, 2025
Gardening Recipes
 
Craft Projects Photography

Crafting Better Photos with an Easy DIY Light Box

November 7, 2012 By radmegan 17 Comments

Happy Wednesday! I’m participating in a week-long craft photography blog-hop featuring Sister Diane from CraftyPod, Haley from The Zen of Making, Stacey from FreshStitches, Michele from Michele Made Me, and me, Megan from RadMegan. 
Haley and Diane thought it would be fun to get all of us together to share our favorite tips, tricks and at-home fixes for craft photography (a subject near and dear to my heart.)
My tip for you is one I shared with my Craftcation Conference students earlier this year and it was a HUGE hit: 


* * * Crafting a Light Box to Eliminate Shadows and Harsh Light * * *
Above photos courtesy of Craftcation Conference and Make Shop Live
In my opinion, natural light, aka the light from the sun, is the BEST light to photograph in. You don’t have to worry about expensive set-ups or the “temperature” of your light bulbs, all you need is a couple of neat tricks to diffuse the light.

Diffusing the light means “softening” the light in photography terms. If you go outside at noon on a sunny day and look in a mirror, you will see a shadow from your nose casting down on your lips. Your lips, eyes, cheeks, hair, and any little wrinkles you may have will also cast shadows. This can be very distracting. You may see the sun’s reflection, like a big white blob on your forehead…

When you go outside on a cloudy day at noon and look in a mirror, you probably look great! No shadows at all, and instead there is a nice even light across your face and hair. 
Unless you live in an area that is overcast or cloudy all the time, you could probably use a light box to take nice, evenly-lit photos of your crafts. Here’s how you can make one.

You will need the following:
– A Cardboard box larger than the majority of the crafts you make
– Box Cutter
– Metal Ruler
– Masking Tape
– Wax Paper (a large roll) or white, plastic trash bags, an old, translucent shower curtain, or even cheese cloth
– A large piece of heavy stock white paper 


Step 1.) Tape the box closed. 
Step 2.) Using your metal ruler as a guide, cut out three panels from the box: Two opposite sides, one front facing, and one on top. I like to leave about an inch and a half border when I cut my panels out for better overall stability. 

 
Note, leave the back and bottom panels in tact. 


Step 3.)  Cut out three pieces of wax paper that are large enough to cover the top, and side panels. I like using my discarded cardboard cut-outs as a template for the correct amount of wax paper I will need. 

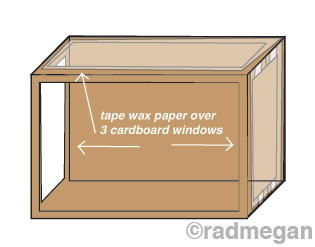
Step 4.) Use your Masking tape and secure the wax paper over the top panel, and two side panels. Work carefully to avoid any wrinkles, cuts or tiny gaps in your wax paper. Tape all four sides of the wax paper down to create a sturdy, solid, translucent wall. 

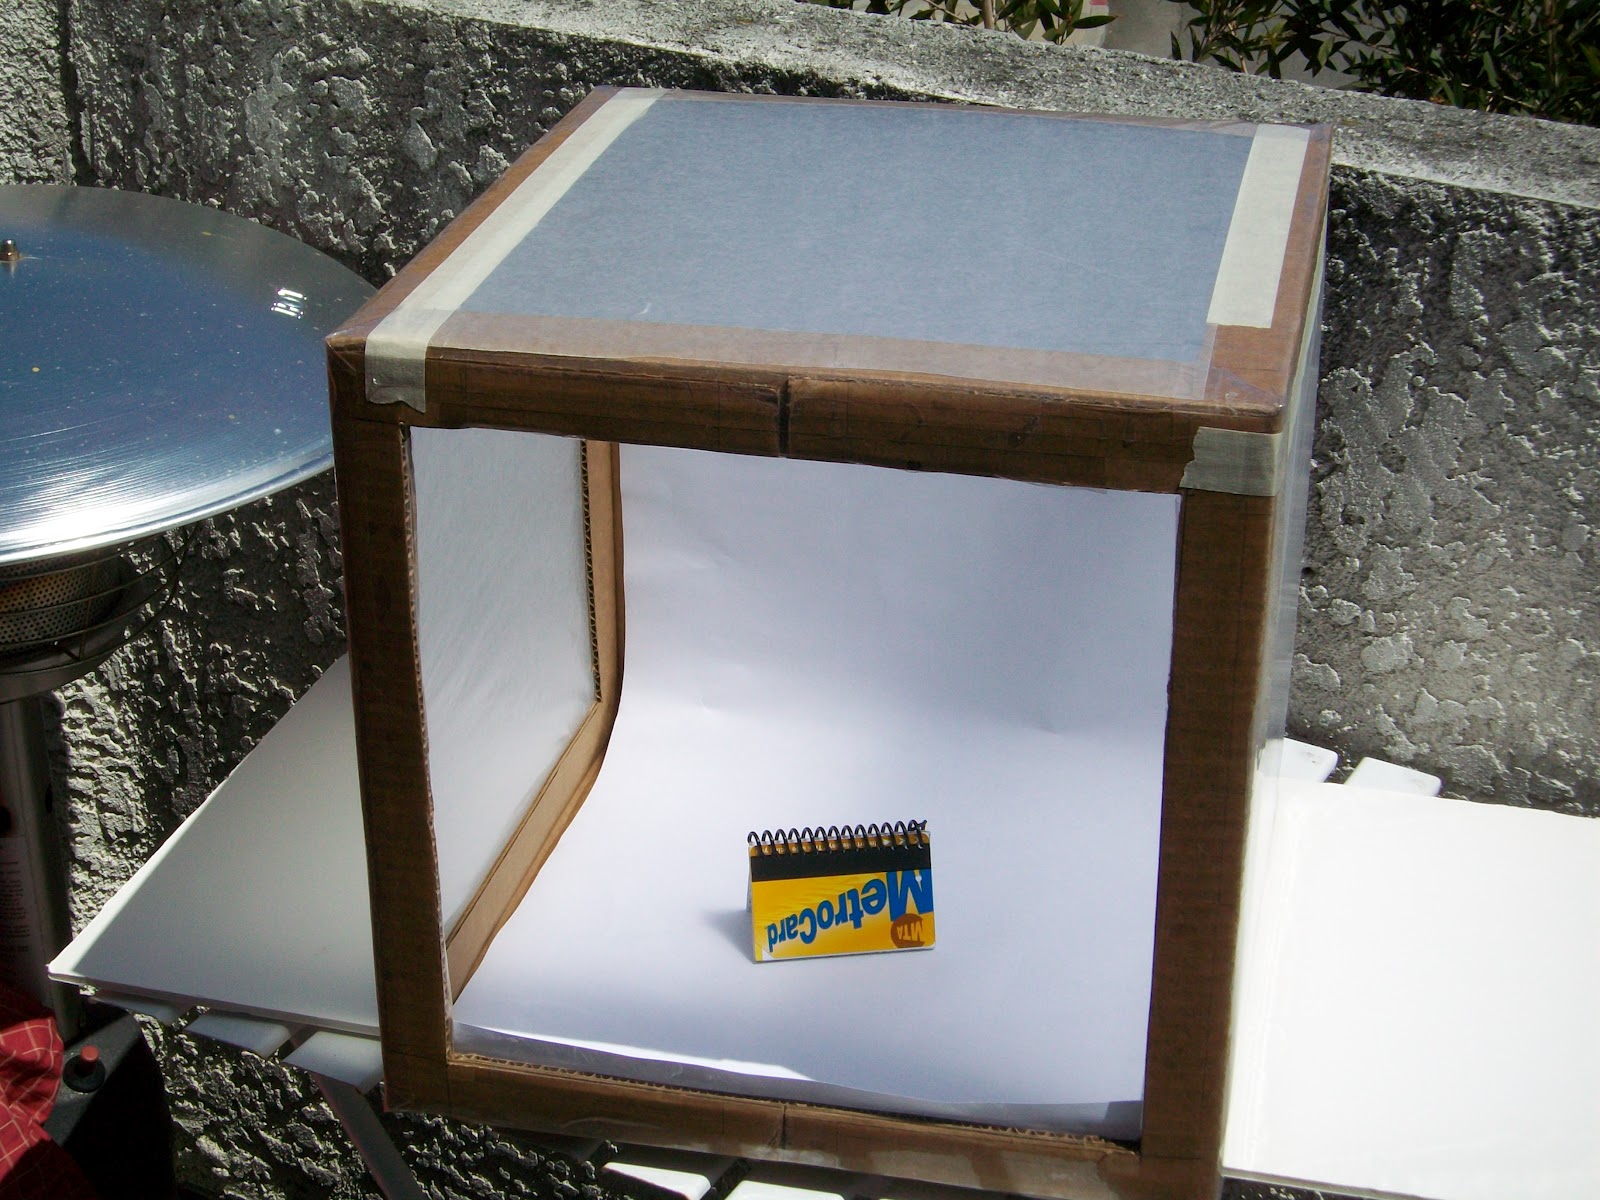
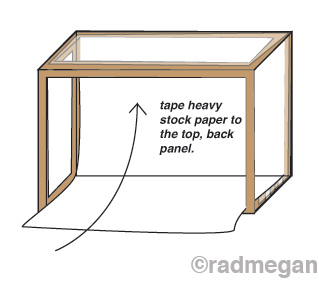
Step 5.) Your light box is nearly done, and only needs a backdrop! Take your heavy stock white paper, and measure it so that it is the same length of your “back wall” in the light box. (The back wall is the one opposite of the only open panel in your box.) Insert the white paper through the opening, and tape it to the very very top of the back wall. It’s fine if the paper is too long and spills out of the box. Avoid folding or creasing this paper, and instead shoot for a gentle curve in the back of your light box. 

Note, the fewer wrinkles or creases in your backdrop, the less photo editing you will have to do 

Step 6.) Take your light box outside in the sunshine, place your handcrafted item inside the box and start snapping photos! The wax paper will diffuse the light for you and give you an even, well-light photo!

When I taught this workshop at Craftcation, my students were so excited, they went outside with their light boxes to see the difference. Below are two student photos snapped with a cell phone. Even with a camera phone, you can see the difference!

Photos courtesy of Stephanie Japel


For more photo tips from me, be sure to check out my two craft photography workshops here and here!


AND as soon as they become available, you’ll be able to find links to all of the other tutorials in this Better Photography Blog-Hop series just below this message. I hope you will visit each blog and check out the tips- so far, I’m loving them all! Big thank you to Haley and Diane for asking me to be a part of this fun and informative week! 

FacebookTwitterGoogle+PinterestShare

Related posts:

Looking Back at Craftcation 2013 Available Now: The Art of Craft Photography Let’s All Meet in Ventura for the Craftcation Conference- March 21-24!! The Craftcation Conference: An Inspiring DIY and Indie Business Whirlwind! craftcation+Speaking at the Craftcation Conference

Filed Under: Photography Tagged With: Blog Hop, Craft Photos, craftcation, Digital Photography, DIY, Light Box, photography tips


Warning: count(): Parameter must be an array or an object that implements Countable in /webroot/r/a/radme001/primary/www/wp-includes/class-wp-comment-query.php on line 399

Comments

  1. Bobbi Lewin says

    November 7, 2012 at 9:04 am

    This is so cool! Thank you for showing us this!

    Reply
    • radmegan says

      November 7, 2012 at 10:29 am

      Thank you Bobbi! I hope this helps you :)

      xoxo
      radmegan

      Reply
  2. Michele Pacey says

    November 7, 2012 at 9:50 am

    Such a useful tool for us crafters. And easy to make with stuff I have around the house, I must say. Thanks so much Megan!

    Reply
    • radmegan says

      November 7, 2012 at 10:29 am

      Aww thanks Michele! I’m so glad you found it helpful! Happy shooting :)

      xoxo
      radmegan

      Reply
  3. thezenofmaking says

    November 7, 2012 at 10:44 am

    I love the illustrations–they make the whole process look simple and straightforward. Great tutorial!

    Reply
  4. JennyPennyPoppy says

    November 8, 2012 at 1:27 pm

    Thank you for the instructions on making this neat lightbox! This will help a lot when I’m taking pics of my stitched pieces :)

    Reply
  5. Li says

    November 17, 2012 at 11:17 am

    Hi Megan! I saw your snail planters somewhere (can’t search this blog for the appropriate post, my laptop is acting up), and I’, wondering which plants you used for the climbing ones!

    Li

    Reply
  6. Women Care Services says

    November 19, 2012 at 3:07 am

    Thanks for sharing the information to build links to sites. It was informative. I need more articles on Wireless Void Phones.

    Reply
  7. New Dress A Day says

    December 30, 2012 at 4:34 pm

    LOVE this Megan!! I must make one stat. Your blog is fabulous and you are most definitely rad!! xo Marisa

    Reply
  8. buzz says

    August 7, 2013 at 12:39 pm

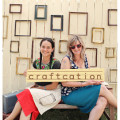
    Thank you so much for posting this – I went to Craftcation 2013, but a light box probably would not have made it back well to the east coast with me. :) Made one at home!

    Reply
  9. Cynthia says

    January 2, 2015 at 8:08 pm

    Hi Megan, I’m way behind in finding this only now but I’m sure excited that I did!!! I’m going to try and make one of these light boxes tomorrow Jan-3 but cannot find the long wax paper at my stores nearby so I wondered if I could use white freezer paper instead???

    Reply
    • radmegan says

      January 23, 2015 at 11:15 am

      YES! You could also try white garbage bags as long as they are not textured. Good luck!

      Reply
  10. Cynthia says

    January 23, 2015 at 12:21 pm

    Thank you Megan! =)

    Reply
  11. Davidrhodem says

    March 2, 2018 at 9:55 pm

    Woowww!!!
    Thanks for sharing the post.It’s most affirmative site. Very easy Cutting of any mettle.The Box Cutter. I love the Box Cutter.

    Reply
  12. Photo Light Boxes says

    April 3, 2021 at 2:34 am

    Wao!
    That’s great, thank u for sharing the information.

    Reply
  13. vividads says

    April 21, 2022 at 11:52 am

    Great share! This post is very useful.

    Reply
  14. Allan Moor says

    May 14, 2022 at 11:25 pm

    Hi! Your DIY ideas on how to make a miniature photo studio are simply amazing, congratulations!
    I’m certainly going to follow your ideas in this regard.
    I’m currently concentrating on the ‘macro’ side in photography, so I think that this idea of your DIY studio is going to be very successful.
    Once again, very many thanks.
    Allan

    Reply

Leave a Reply Cancel reply

Your email address will not be published. Required fields are marked *

CommentLuv badgeShow more posts

Follow Me

  • 
  • 
  • 
  • 
  • 
  • 

Find posts on this blog about…

Instagram

Get posts via email

Welcome!

I'm a crafter, cooker, gardener, and photographer.
Read More...
Learn Craft Photography with Radmegan

Friends

back to top
© Megan Andersen Read. All rights reserved.
Interested in using my photographs? Contact me.
Web design by Hearts and Laserbeams