So this past Sunday I set out to make a traditional wreath. Why BUY a wreath when you can craft one, right? When I began this project, I was thinking I would end up with a basic, round wreath made from willows collected during a recent back-yard clean up.

I began by cutting my willow branches down to similar sizes, and positioned them in a circle. 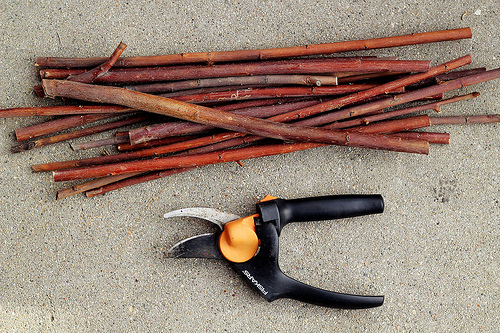
The circle quickly became unruly, so I scraped tradition and went with a square wreath.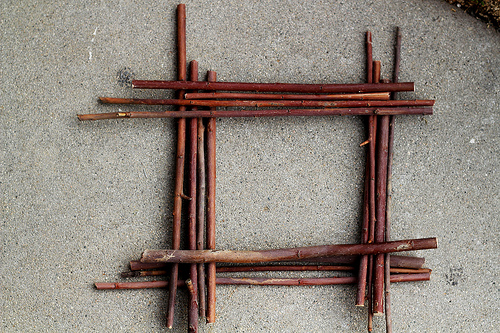
Suddenly I was envisioning a sleek and modern wreath. Something with sharp lines and crafted with machine-quality precision. It would hang in a cavernous and echoy living-room with Eames-era furniture, high-polished concrete floors, vast floor-to-ceiling windows and ultra-patterned wallpaper. Then I remembered what my own house looks like (Picture an earthquake in Santa’s Workshop), and decided to just go with the flow and hope for the best with this project. 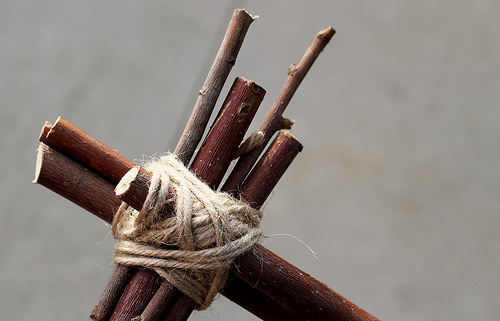
I bound the corners with a jute-fiber twine; wrapping tightly, typing a square knot and securing each binding with a dab of wood glue. 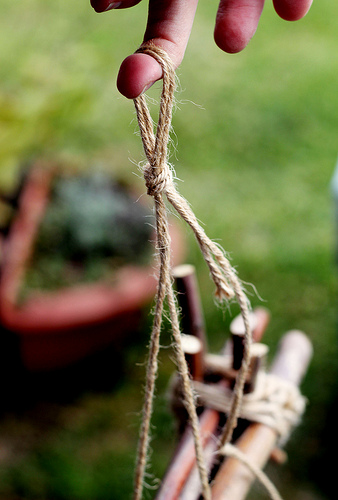
After binding all four corners of the wooden wreath, I tied a second piece of jute through the middle/top branches and added an Angler’s Loop to hang the willow frame when complete.
When I sat back and looked at my square wreath, it didn’t look modern. It looked, plain, unfinished, and a bit dull… It needed something.
I began rummaging through a box of Christmas decorations in the garage. I selected a single red ornament and went back to the wood pile, where I chose a few small branches that had been previously overlooked. I was swept up in concept and hoping for a successful execution. My square wreath was about to become a modern (gasp!!) REINDEER WREATH! 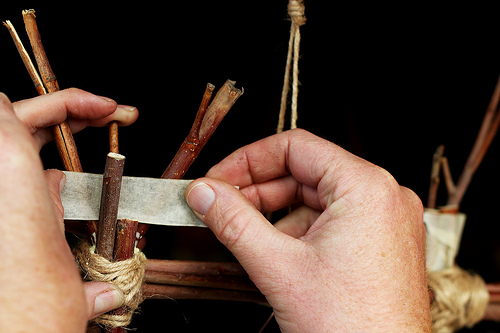
I wanted to create antlers out of the twigs that had branched off into lovely Y-shapes. I held them in place at the corners of the wreath while my husband secured them with masking tape. Then I wood-glued the heck out of them to ensure stability. I wiped up any visible drips, and let the glue set overnight before removing the masking tape.
With a piece of thin copper wire I hung the ornament so that it fell smack in the middle of the wreath, and stood back to admire my creation.
My husband enjoyed it too 

I love this reindeer wreath and am proudly displaying it this holiday season, and many more to come.
If you have garden shears, twigs, twine, wood glue, masking tape, thin wire or even fishing line, and a red ornament, I’d encourage you to make your own red-nosed wreaths! It’s a cheer and modern take on the traditional willow wreath, and a lot of fun to make. Happy holiday crafting!!


i love this! very modern and cute.
Thanks Missmae! You should make one for your door! xoxo
This is the most awesome thing I’ve seen all season! Love it!
You are a genius!
Awww Thanks Catherine!!!
And thanks Vic!!
Great. MONTHS too late, and I so want it!