
Despite turning my home into a workshop of knitting, sewing and baking to create homemade Christmas gifts this year, I really haven’t done much to decorate, and this weekend it started to bother me. I’m not sure if we’ll be getting a REAL Christmas tree or not since my darling husband keeps telling me that our dried out, and probably slug-infested mini-tree from last year is “Perfect!” and “Just shake off any slugs and bring it inside!” *shudder*
Ignoring his sage advice, I got to work crafting up my own tree from materials I scavenged out of storage; this one guaranteed to be slug-free and smelling of spicy holiday candle. Mmm.
For this craft you will need:
A Coffee Tin
Sharpie
Tin Snips
Metal Files
Leather Gloves
Protective Eyewear
Trash Bin
Nail
Hammer
Rounded scrap wood/log/dowel
Yummy-Scented Votive Candle
To begin, draw a Christmas tree directly on the label of the coffee tin- about 1-inch up from the base. This 1-inch lip will act as a wax collector for candles.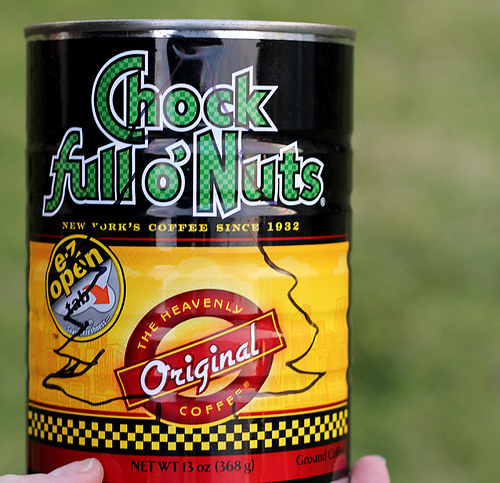
Next, don your eyewear and gloves, and grab the tin snips! Working over a trash bin, snip away the lip of the tin, and then cut out the shape of the tree. Working over the trash will help keep the tiny shards of metal from going everywhere. Nothing worse than metal slivers in your feet! Remove any remaining bits of the paper label after you have finished cutting out the tree. 
Now take your metal files, and (again, working over the trash) file away any jagged edges. The metal is going to remain somewhat sharp even after you file it, but I recommend giving all the newly cut surfaces a good filing to dull them down as much as possible. 
Next, place the tree shape atop the rounded scrap wood. Secure the wood with either a vice, or by using your own body weight to press it down, and hammer the nail into the tree shape repeatedly to create holes for the light to shine through.
And that’s it! You could steel wool your tree to leave a pattern on the metal, or give it a coat of paint, but I like the look of the exposed metal. Add the candle and you are all set! A coffee tin Christmas tree that creates awesome shadows from one angle, and looks like a twinkly tree from another! 
More holiday decorating to come!


I made one of these with my brother at camp one fall here in tacoma. Nice.
Cool! Sounds like a fun memory- thanks for sharing