I was given several pieces of foam board recently, and thought I might try to make a puzzle from them. Here’s what I used, and how I did it:
Materials:
Foam board
Ruler
X-Acto knife and replacement blades
Cutting mat
Pencil
Acrylic Paint and brushes
Spray Mount
Step 1. Draw out the plan. I sketched two pumpkins, and thought about how they might look as puzzle pieces. I tried to avoid very small pieces, as they would be especially flimsy and susceptible to breaking easily. I also needed to re-work my drawing when I noticed the curve of the pumpkin stem created a hole in the puzzle. 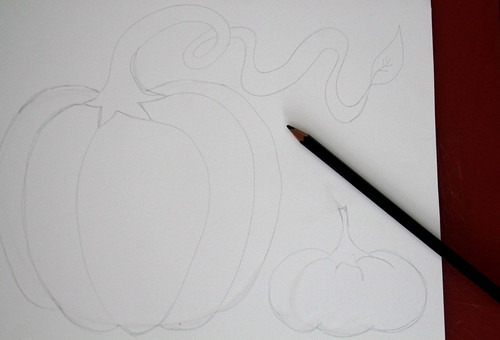
Step 2. On a cutting mat, and using a very sharp blade, I carefully cut around the drawings. These would become the individual puzzle pieces, so keeping them in-tact was important. I also tried to cut very clean lines by going slowly, and swapping out X-Acto blades when they started to feel dull.
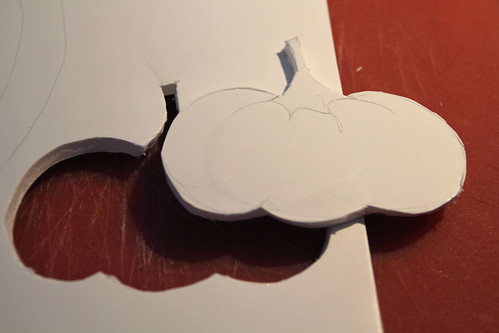
Step 3. Once all of the puzzle pieces were cut out, I went back with a new X-Acto blade and cleaned up any frayed edges on the outline of the puzzle, and on the individual pieces themselves.
Step 4. I then chose a second piece of foam board, placed it under my original pumpkin cut-out, and traced the insides of the two pumpkins onto the second piece. 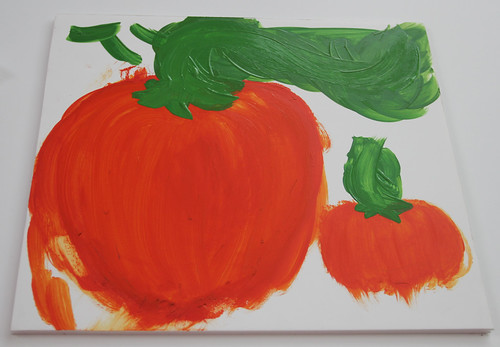
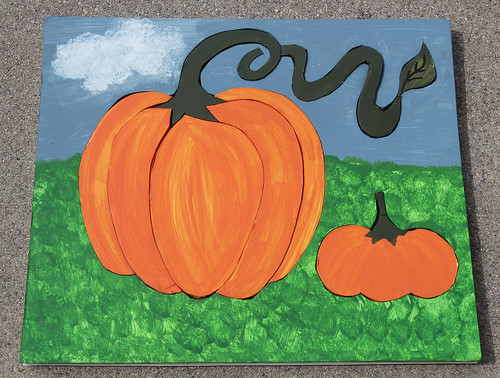
Step 5. Now that I had drawn the pumpkin shapes onto the foam board, I painted it. This would serve as my puzzle base. I used acrylic paint, and didn’t worry about staying in the lines too much, because any small mistakes would be covered by the top puzzle piece in step eight.
Step 6. I painted the top of the puzzle, including the edges of the foam board inside and out.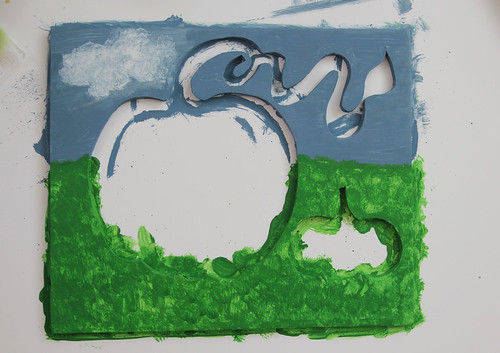
Step 7. I painted all of the individual puzzle pieces front, back and side, and let them all dry completely. 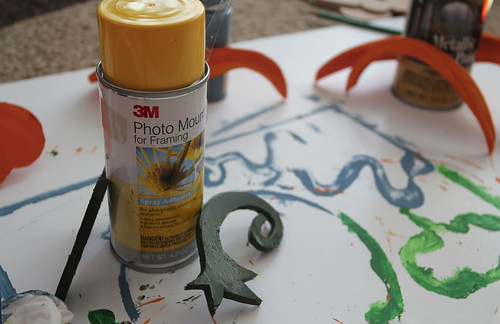
Step 8. I laid paper down outside. With spray-mount, I glued the backside of the top puzzle piece, and pressed it into the painted side of the puzzle base, aligning both pieces of foam as closely as possible. 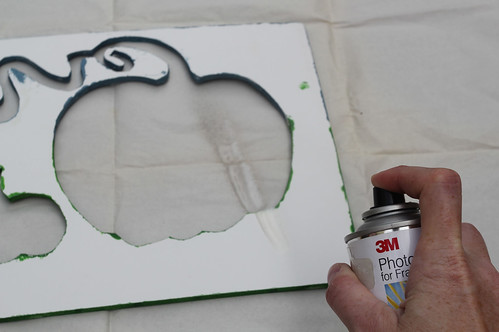
Step 9. Once glue was set, I used a ruler and X-Acto knife on a cutting mat to trim off any extra foam board. I wanted the two pieces to be the exact same size and shape.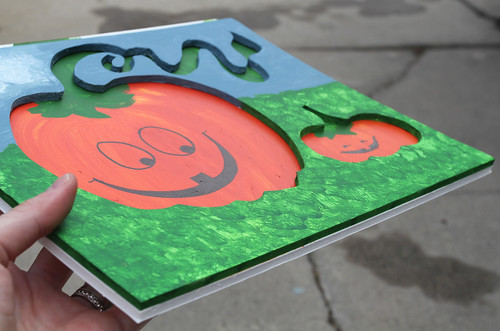
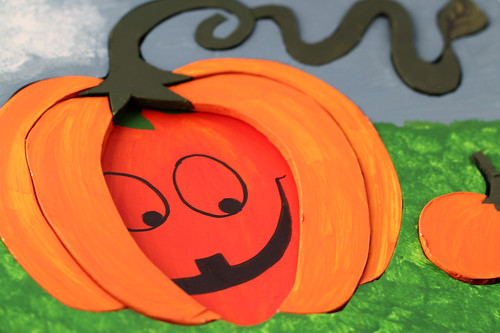
Step 10. I placed the individual puzzle pieces in the base, and was ready to give my pumpkin puzzle to a special someone. This light-weight puzzle gains extra strength from the paint, but is not baby-proof. I suggest ages 3+ 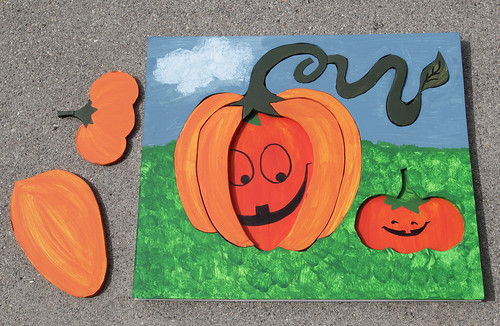
Total craft time: About 3 hours with paint-drying time. Thanks for reading!


That’s awesome! I never thought to make a puzzle out of foam board! Cheap and easy! You are so creative! Also, I just thought of how you could make the little hold on to thingy’s for babies who aren’t coordinated enough to pick the pieces out. thumb tacks with super glue on the end!
I LOVE the idea of thumbtacks with glue on the ends. Great addition Jess!
 Thanks for reading!!
And yes- cheap and easy! I wanted to make a puzzle out of wood, but when my husband isn’t home, I’m not 100% comfortable working the power tools… foam board is sold everywhere, and as long as you watch your fingertips when using the X-acto knife, WAY less dangerous than being on a scroll saw in a lonely wood-shop! Hah
Woot! Way to bring back those board puzzles! The faces underneath make it doubly sweet. And I actually think the foam is better for tiny hands anyway.
Impressive. This is so adorable. I like how you are teaching people to make puzzles for gifts or for their own children. Nice!
This is a lovely idea for gifts. If you want to give it a little shine and add a little durability to the paint (or even reduce tack) give it one or two coats of an acrylic sealer.
Beautifully done and great tutorial! You inspire me.
Thanks Lauren

Thanks Sara, it’s all just practice for the day I have a litter of my own…
Thank you Claire! I like the idea of a little shine
wqJMLXhEsemSYijOSQ 9966