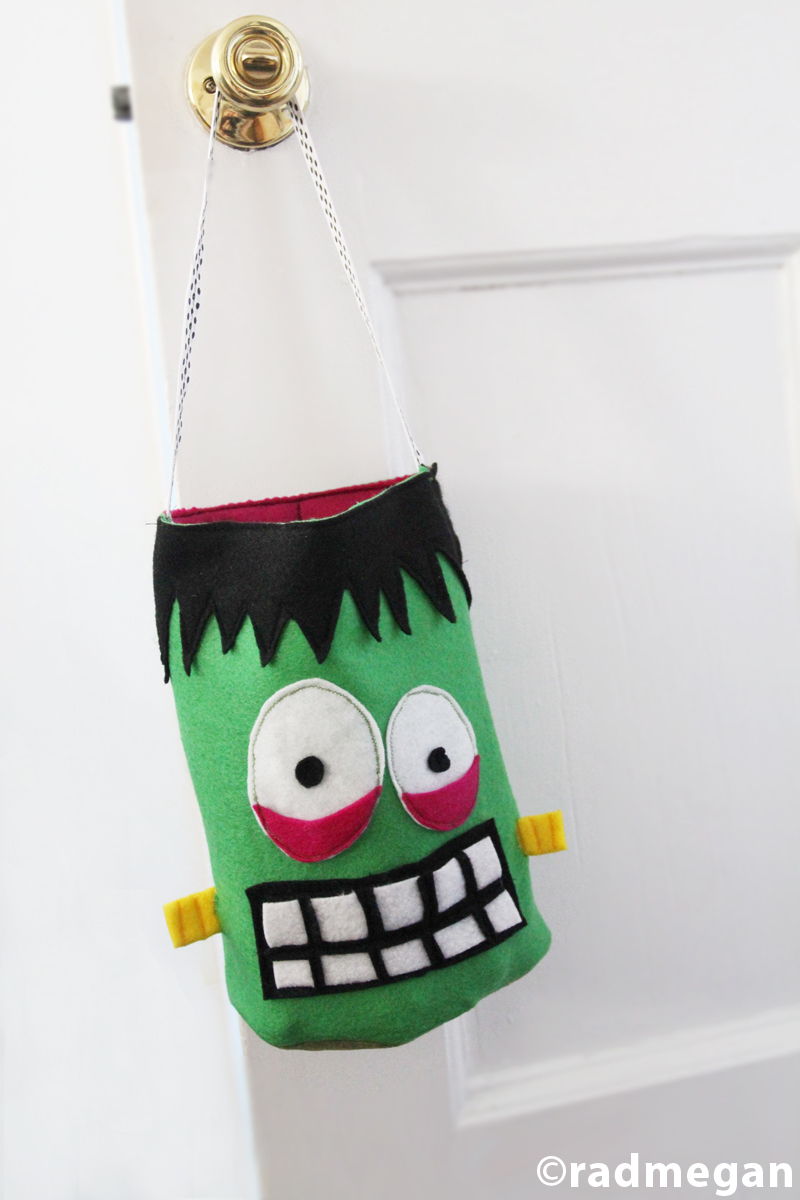
When I was little, my mom made me a trick-or-treat bag shaped like a pumpkin. I was so proud of it that I used it for as long as I can remember. The bag I made for my nephew is not nearly as spectacular as the one my mom made me, BUT, it’s a quick afternoon project that uses little more than a few sheets of felt and some thread! If you have kids (or are an adult kid-at heart) read on… this might be a quick craft that makes you a Halloween hero. Or at least, a stand-out trick-or-treater.
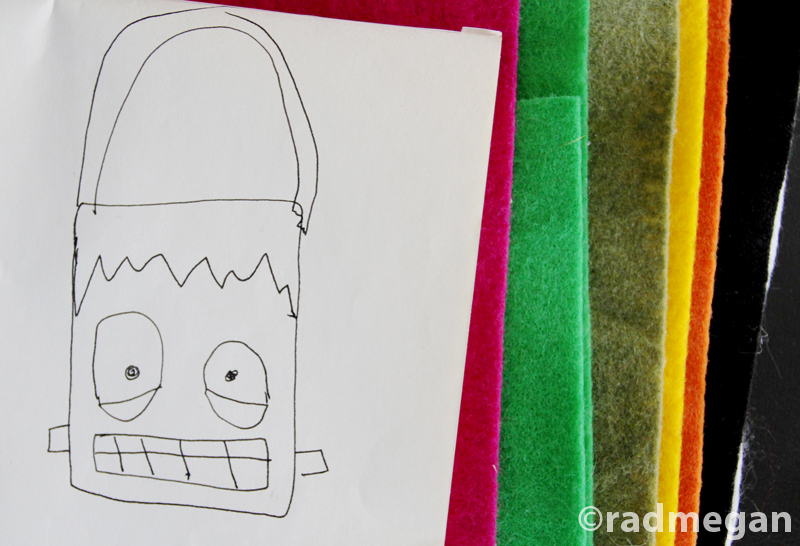
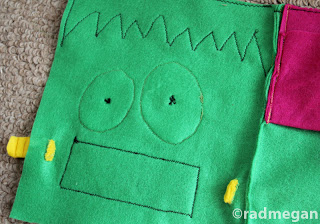
When I set out to make a Halloween candy bag, I had my heart set on making a pumpkin as well. However, I own almost no orange fabric or felt sheets. I DID however, have 2 pieces of Kelly green felt, one black, one yellow, one moss green, one white, and one magenta. I sketched out a Frankenstein (above) and began deconstructing the pieces to make the bag.
I’m not amazing at sewing. Fortunately, Frankenstein’s head is cylindrical, so I started by sewing two of the Kelly green pieces together at their longest side and already had the basic shape of the head done! Next, I cut out all of the facial features from the various colored felt sheets.


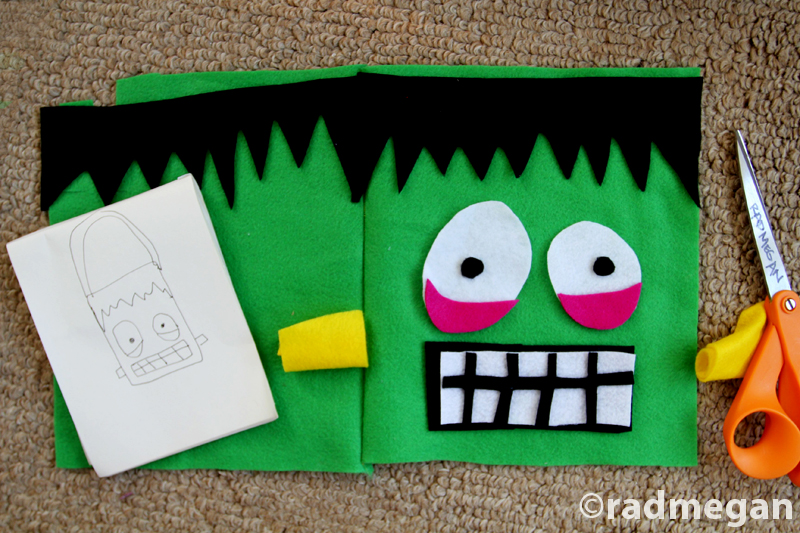
I sewed the zig-zaggy pieces of black felt across the top of both green panels to create the hair. Next I folded a rectangle of magenta, and sewed that to the inside back of the bag (see above) to create a pocket inside the bag (for house keys or mini flashlights) and to cover the stitching of one of the hair pieces.

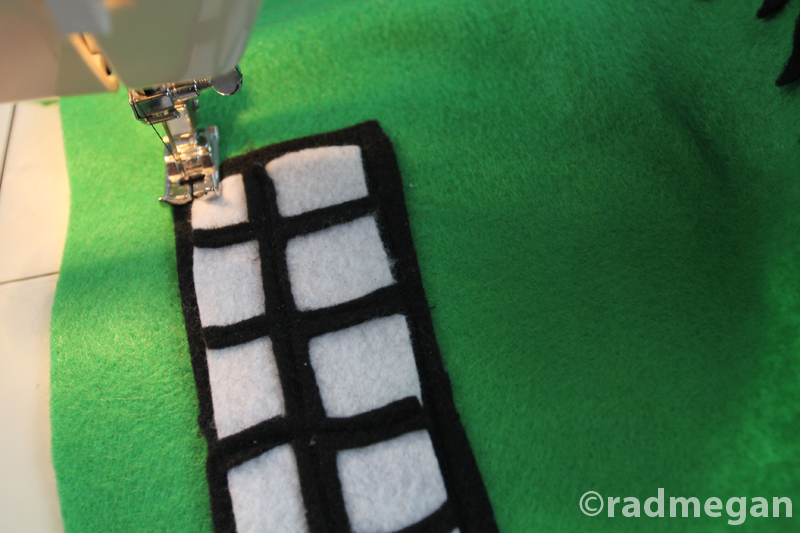
After the inside pocket and hair were done, I sewed the teeth together, and then attached them to the lower-front portion of the head. I wanted to position the mouth first, so that I could recapture the same general expression of my original drawing.


Next came the eyes. Each eye included a white oval (varying slightly in size), a magenta lower eyelid, and black felt pupils. Using green thread, I sewed them directly above the mouth.
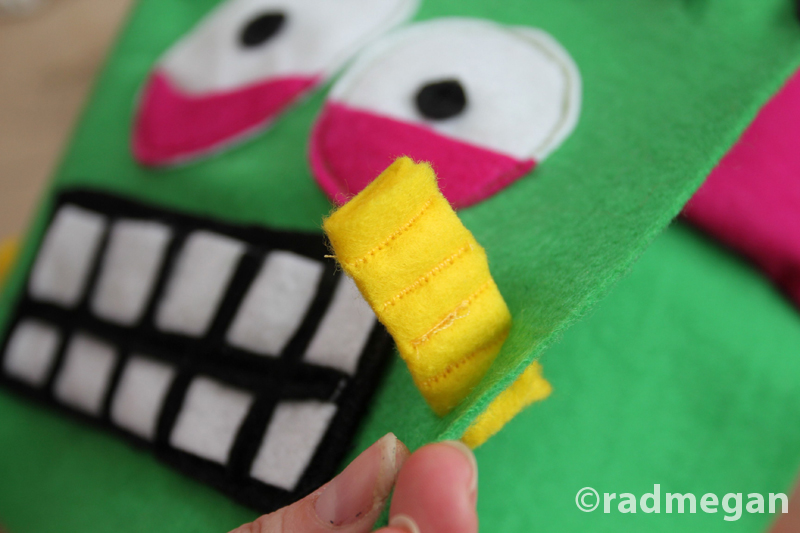
Once the face was complete, I rolled up small (about 3×4.5 inch) pieces of yellow felt, and stitched parallel lines into them for texture. I made a small cut in the green fabric on both sides of the mouth, and then hand stitched the “bolts” from the back side until they were secure. Then, I cut the bolts down to a more proportional size.
 |
| View of the inside panel |
My last steps were to fold and pin the two Kelly green sheets together at their longest sides, closing the piece and making the bag shape. Using my moss green felt, I cut out a large oval that would act as the base of the bag. I was eye-balling the project, so I made my oval FAR larger than I needed.

I opened the cylinder as wide as possible, and pinned the moss green oval to the base of the head (just below the mouth.) Then, since I was guesstimating sizes, I cut away the excess from the base, stitched it up with the sewing machine, and then sewed the long side of the face.


Finally, I turned the whole bag right-side out, and attached a length of scrap ribbon inside the head to create the handle.

It’s not the world’s cleanest sewing job, but it’s sturdy, comfortable and totally spooky.

Ok, and in my humble opinion, a little goofy-looking. But isn’t that what being a kid at Halloween is about?

Are you dressing up for Halloween? And if so, are you making any elements of the costume?


This is pretty freakin’ fantastic!! Love the expression on old Frank’s face!
That is awesome! I love projects made from felt!
Love this!!!! he is too adorable.
thanks. made a copy of this for my niece. she is going to love it.
it’s really so cute^^