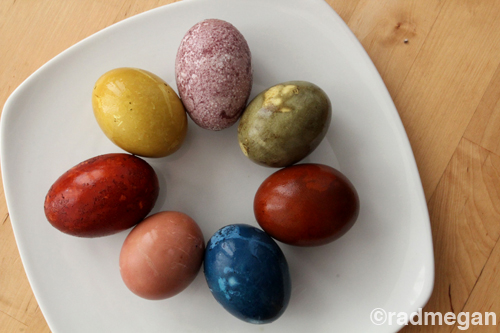
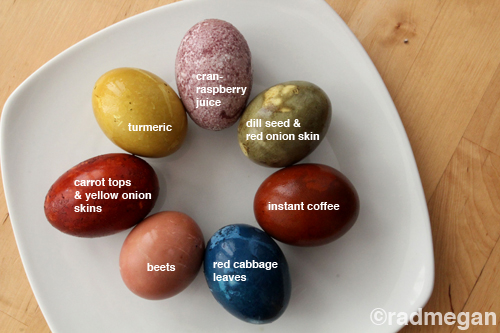

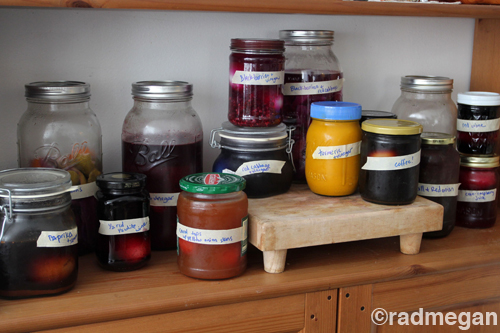


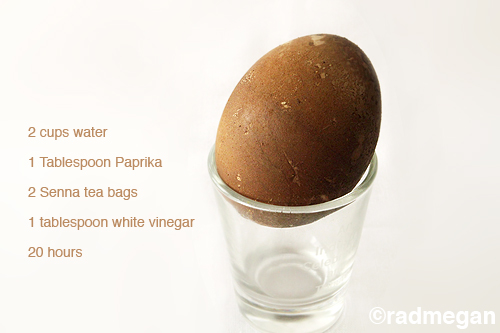
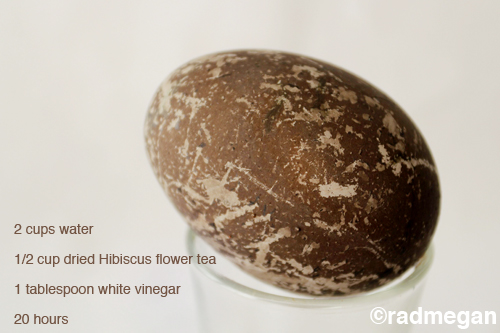
Below are the individual “recipe cards” for just about each egg color I made…

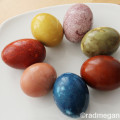
I loved the speckled result I got when I boiled an egg in straight cran-raspberry juice…

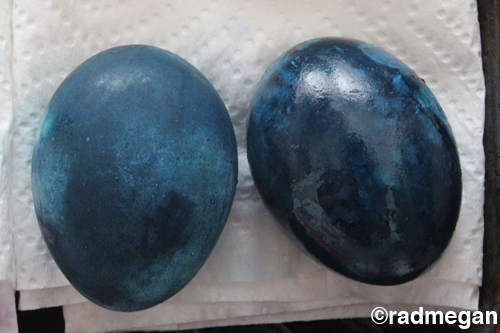
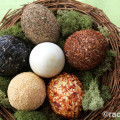
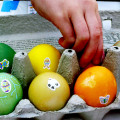
Adding the mineral oil polish to some of the eggs really did provide amazing textural contrast to the ones I left in a natural matte finish.
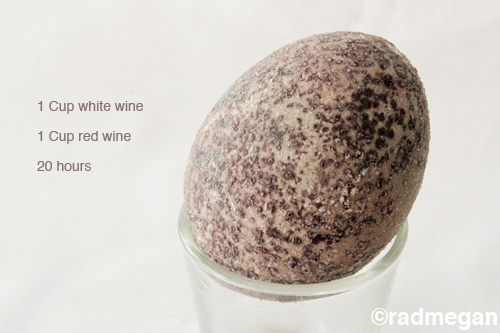
When I dyed this egg in half white wine and half red (the cheapest Trader Joe’s carried) these INCREDIBLE crystals formed all over the surface of the shell. It looked like a snow-encrusted version of the cran-raspberry egg! I tried dyeing an egg in straight red wine and got the same crystal-formation with a more plum colored egg! If anyone can explain the science behind this, I would LOVE to know!

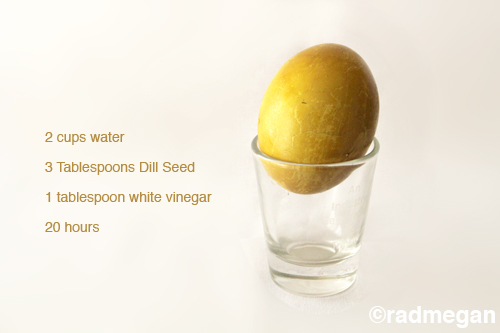
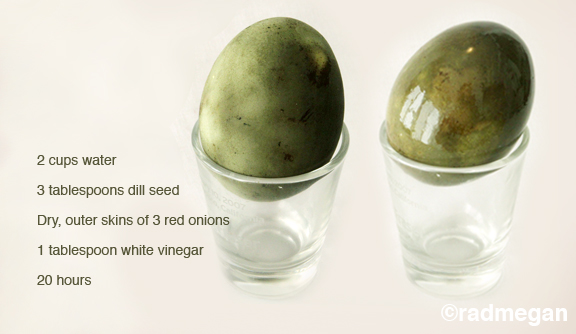
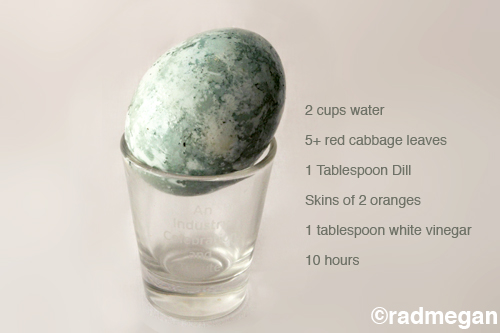
Straight dill seed, water and vinegar came up with this really nice lemon-lime color.


What’s the word on how permanent the dye is? Do you think the eggs need to be sealed with something and, if so, maybe the mineral oil will work?
So excited to try this…
Pretty darn permanent! I tried to rub off the dyes after the eggs had dried completely…no luck. It got me thinking that I should use my egg dyes for fabric.
I wouldn’t seal the eggs unless you blow out the insides before dying them… just because if you do plan on eating them, you wouldn’t want the fumes/chemicals from a sealer in your food. If you want the shine and the taste, try olive oil to gloss them up!
Let me know how yours turn out! Thanks for reading & commenting!
These are so beautiful! I’m thinking a little random gold leaf on some of those might be nice. The oil will make it adhere. Thank you! Will try with this year’s eggs.
How cool!!! gosh those are awesome.
this is awesome!!!
Thank you Christi and Devon!!
xoxox
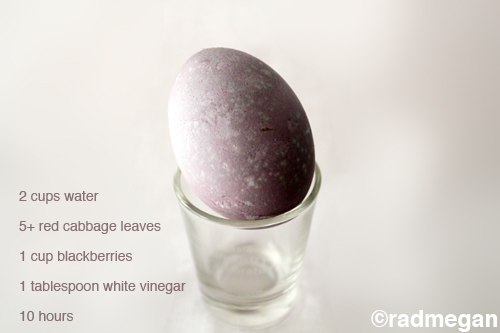
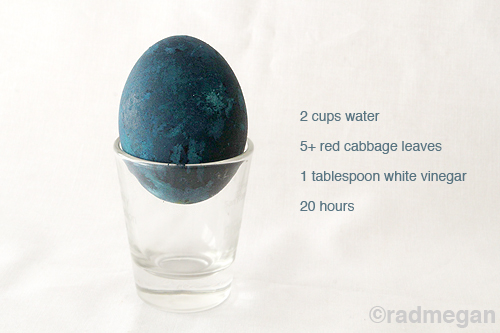
Wow, gorgeous! Who knew cabbage leaves could do that?! Thanks so much!
I know! We should dye some yarn or riving next!
xoxo
Wow! Thank you for that effort! I have been looking for a way to dye my eggs naturally this year and I am so happy to have found your post! Would you mind if I present it to my readers, hoping to inspire them to do the same? Amazing!
Hi Sonya, its Sonya
teehee (thats so jouvenile!)
Thank you so much Sonya! Sure- please do share the info. If you could link to this blog, that would be very nice of you I’m happy to share “green” ideas with new friends
Thank you for the nice comment!!
xo
Megan
Awesome! Thank you! In fact, I already sent you an email because I didn’t expect you to be here right now The magic of Internet!
Aaaaawesome [Mr 7s favourite word this week!]
Have email suscribed, followed and linked.
Let the colouring begin ;D
~Sonya, in the Sago bindery~
http://www.sagoontuesdays.com.au
oo – question – how long might you say you could keep using the solutions you made before it goes mucky? I tend to use my tea/coffee a few days in a row to get the most paper done as I can… and the colour intensifies with every passing day, with awesome sedimental effects too.
S
Thank you Sonya!! 😀
Nice to meet you!
These are beautiful! I definitely want to try it now
Thanks Jane! I hope you do!!
xoxo
This is so cool! I cant wait to try this with my girls! I will link to your tutorial for sure!
Oh my, will my 2 little grandsons get into doing this. (So will Grandma!) Thanks bunches!
This is too cool! The colors of the eggs turned out beautiful!
These look lovely! Just out of curiosity, did the “flavor” of any of the dye ingredients soak through the shells and into the egg itself? After 10-20 hours of soaking, I could see that happening with some of these dyes.
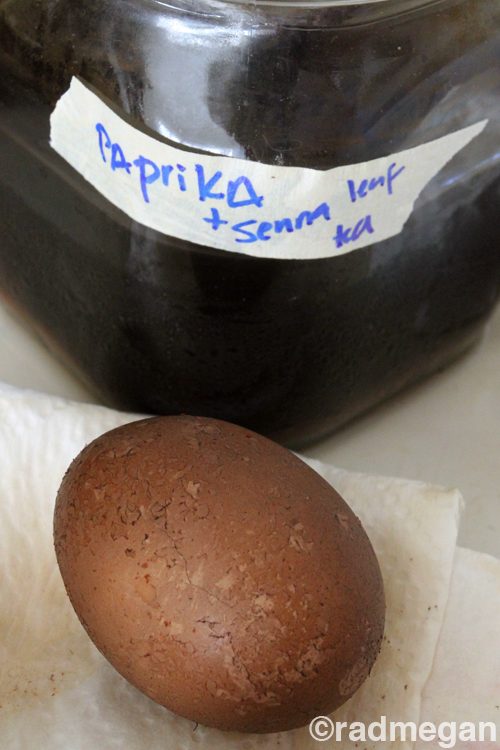
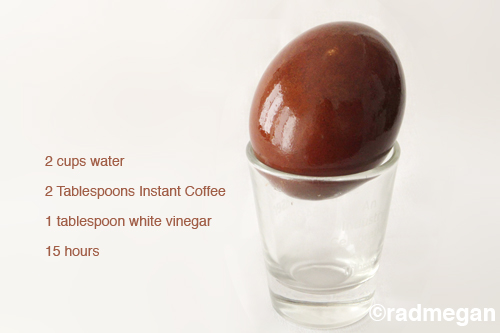
Great questions! We didn’t eat any of these because they were so darn lovely, HOWEVER, a long while ago, I made these Chinese Tea Eggs (similar natural dye process… and they were quite good! http://radmegan.blogspot.com/2010/08/cooking-at-home-chinese-tea-eggs.html
Hi,
I saw this on the Drs. show and just happened upon your blog. Kudos!!
i love all the colour and texture.
I wonder if olive oil or another food grade oil would provide the shine and still be edible?
Wow yay! I didn’t think anyone would find me since that segment was edited down so dramatically! Thank you for letting me know! 😀
I would say that yes, coconut oil or olive oil would be great to use instead of mineral oil.
xoxo
I just stumbled on your blog through Pinterest. These eggs are magnificent!
Welcome! Thank you so much Gwen!
xoxo
I would avoid mineral oil, especially if doing this with kids. Rather you could use one or a combination or coconut / olive oil, with or without some beeswax. The three together are something I have on hand for furniture polish and hand balm!
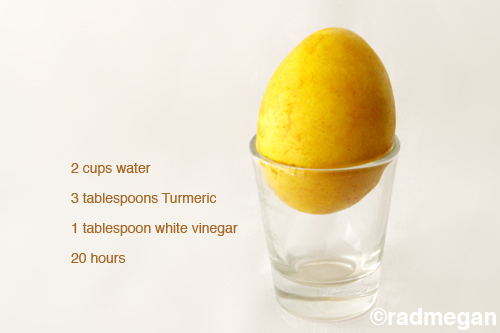
Beautiful eggs. If you use the dyes on fabric, though, be aware that natural dyes often don’t hold up as well to washing… use cold water and a gentle cycle, and don’t dry them in the sun. Turmeric in particular is not UV-stable and will fade rapidly when exposed to sunlight.
Fantastic! Thx for sharing this, I will try some of them.
The crystals on the wine-dyed egg are likely tartrate crystals aka wine diamonds. They show up in good wines, so maybe Trader Joe’s cheap wine is a good buy. Here’s more: http://winesworld.com/index.php/wine-crystals/68/
Ha! Maybe “Two Buck Chuck” is a great deal! It sure makes lovely eggs! Thanks for the info!!
xoxo
Wow! Amazing! Thank you so much for posting this and showing so many photos w/ the instructions! I like the Turmeric and the red cabbage ones especially!! I’m going to have to try this! Thanks again!
Very informative. I do use grated fresh beets and get a nice deep pink. Waldo I prefer vegetable oil instead of mineral oil to polish them. We decorate with leaves and wrap in a piece of pantyhose. Awesome
Thanks so much for sharing this! We tried it with my boys for Easter (we had * just * enough time). While we didn’t get the textures that you did, they were certainly gorgeous colours! Did you leave the ingredients in the water when you put them in the jar? Also, we ate about half of ours, and they didn’t seem to be flavoured at all (we tried them straight, and as egg salad) – though some of them had colour.
RadMegan, your eggs are rad!
Question: I want to blow out the insides so I’m planning on dying the eggs uncooked (then blow them out afterwards). Any reason you think this might not work as well with the dyes as when they are boiled with all the ingredients?
Correction: I’ve blown out the eggs and am trying to figure out if I should put the empty shells in while the dyes boil (like you did when you hard boiled the eggs), or just afterwards in the jars? Will it still take? What do you think?
I would like to know this as well! Thanks for posting!
such a wonderful colours you have achieved with them. I have died and printed gooseeggs some years ago. You can change colours with changing the pH and use ashwater. Or dye fabric and eggs in one time, using the egg as a resist for shibori. If you like I can send you some photo’s for your book :)))
such a wonderful colours you have achieved with them. I have died and printed gooseeggs some years ago. You can change colours with changing the pH and use ashwater. Or dye fabric and eggs in one time, using the egg as a resist for shibori. If you like I can send you some photo’s for your book :)))
fabulous idea, way too time consuming to be realistic in our household tho
I have found that blown out eggs float in the dye and don’t submerge….looking for a way to work.around this? Any suggestions?
As a fiber junkie! Using all these dyes is great for, hemp, cotton. silk and wool. The different fibers will give you different hues. But but the fabric or yarn has to be natural and use is with vinegar. or it will not set
What a fantastic updated way to dye eggs. I shared your link for others to view your many ideas for Easter egg dyin. I will be doing this with my kids, some in a shorter time and they will be scientifically learning how the time of soaking can affect the color of the eggs. Thank you!
Hello! The colours got out so beautiful, I want to try it to paint the Easter eggs! I’m curious about the quantity of water, how much is a cup of water you used? Also, if dill instead of dill seeds works for obtaining the yellow colour? Thanks!
This is because this device assures to either benefit or cure the autistic people in more ways than one.
* Let you know there are things you can do to improve y0ur ranking.
The only tab of your concern is Public Templates, and no actions are necessary as it
is already on the screen.
my page – Google
Google recently posted…Google
No one routes for the evil villan who’s run off with
the hero’s beau, same applies to a site that’s been stuck in Google‘s naughty corner.
* Let you know there are things you can do to improve y0ur ranking.
And then on March 20, the world’s largest paid private blog network – BMR –
announced that its vast network had been almost entirely
de-indexed by Google, causing chaos in the internet marketing industries.
Google recently posted…Google
I’m a little confused by the directions and very excited to try these natural dyes. Do you actually bowl the eggs in the solutions then tore them in the jars with the same solution? Or rather do you bowl the eggs as normal and then just store them in the solution. Can’t wait to try these dyes.
I was a bit confused as well, and would love some clarification, so tagging along with this post!
So are there any that would be good for kids (cuz Lord knows they aren’t going to want to do a 20hr waiting project lol)? & also does the boiled egg then taste like what you used?
The eggshell is made of calcium carbonate. When calcium carbonate is exposed to an acid (ie. wine, vinegar etc) it will form crystals called calcite.
tRAAyfBjQMofGLHjWv 8405